Accept card payments
Some examples card acceptance use cases include:
- An e-commerce platform that allows buyers and sellers to transact
- A software-as-a-service (SaaS) platform connecting service providers with clients
- A utility or subscription based company looking to allow their customers different payment options
The examples below provide step by step instructions on allowing a merchant or platform to take card payments from customers.
For the purpose of this guide, we assume that you’ve already onboarded your merchants. To learn more about onboarding merchants, read our hosted onboarding guide.
Onboard cardholders
To onboard a cardholder, you’ll need to create a Moov account for them and then link their card to the newly created account.
Create a Moov account for the cardholder
You can create cardholder accounts by providing their full name and a valid phone number or email address. In a checkout scenario, you can create these accounts when the customer is prompted to pay. When you create accounts for your cardholders, they will automatically receive the transfers capability.
failed card status (declined).
|
|
|
|
Link their card to the Moov account
You can use the pre-built card link Drop in an HTML document as shown below. Once the information has been submitted via the Drop, Moov verifies the card details with card networks. You will not be responsible for storing or handling any of the card data, since all PII goes directly to Moov.
|
|
If you have submitted an attestation of PCI compliance to Moov, you also have the option to link cards directly through the API. If you opt for this method, you will be responsible for storing and handling card data.
|
|
Submit the card payment
The customer’s card will be the source of funds, so we’ll need the card-payment payment method from their account. You can obtain the paymentmethodID from the payment methods GET endpoint. The sourceID should be the cardID from the cards GETendpoint.
Since the merchant’s wallet will be the destination of the funds, we will need the moov-wallet payment method. You can obtain the paymentmethodID using the payment methods GET endpoint and finding the moov-wallet payment method associated with the merchant account.
To submit the card payment, create a transfer from the cardholder (source) to the merchant (destination).
|
|
Card-based payments first settle in a Moov wallet. The funds can later be moved to an external bank account through a disbursement transfer.
X-Wait-For header in the request, you will get a synchronous response that includes full transfer and rail-specific details from the payment network. This is useful for when a user is clicking a button to make a payment and needs a synchronous response so they can get confirmation that it worked. If you omit the X-Wait-For header, you will get an asynchronous response that only includes the transferID and the timestamp for when the transfer was created.
Check status
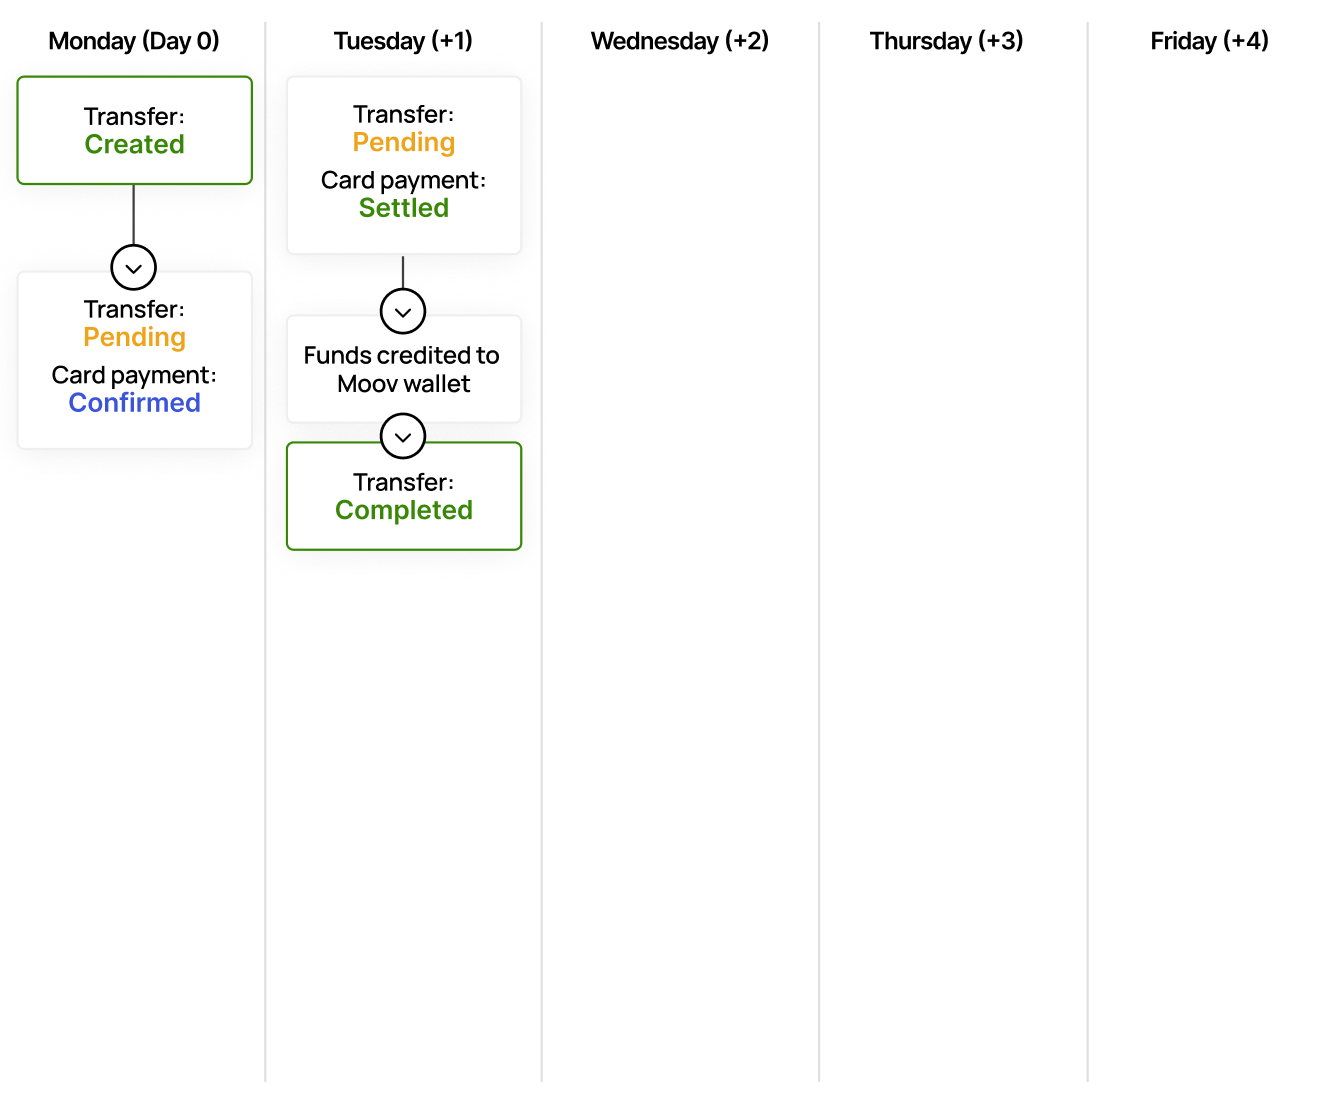
After a transfer is created, it will be pending until the funds are disbursed to the destination moov-wallet. Funds typically settle and become available by the end of the next business day. You can check the status of the transfer anytime using the GET endpoint.
You can also see card specific status details in the response within the source.cardDetails object.
|
|
Access funds
Once the payment has been processed and the funds are available, the funds can be moved out of the merchant moov-wallet using another transfer where that wallet is the source. Bank holidays may delay the availability of funds.

Cardholder disputes
As the main account holder, you are responsible for notifying impacted merchants of any incoming disputes. You can receive notifications about incoming disputes by setting up the dispute.updated webhook. Read our webhooks guide for more information.
If you receive a 202 response from creating a transfer, do not consider the transfer as successful or failed. Instead, you should wait for the webhook notification to determine the status of the transfer, or subsequently look up the transfer status using the transferID. Read more on our transfer responses guide.