Quick start
If you have not done so already, use the Moov Dashboard to create an account. You’ll need to be approved for a production account before you can start moving real money. An individual with administrator or developer permissions is required to continue with this guide.
Read our documentation for full details on any of the topics covered in this guide.
Resources:
Prerequisites
After being approved for a production account, you’ll need to create API keys. We strongly suggest you explore test mode before using production mode. If you’re ready to jump into production mode, make sure to take any necessary precautions if you’ve previously been using test mode.
Create API keys
To use Moov’s API, you’ll need to generate keys. In the Dashboard, navigate to Developers and click the New API key button. Test mode and production mode each require their own API keys. To create an API key:
- Name the API key (we suggest giving it a name that relates to the purpose)
- Make sure to copy the key and save it in a secure place
- Add any domains you’ll use for testing and production
- Optional: Include a note to remind you where the key is stored
Read the API keys documentation.
Authenticate
Most capabilities you request for accounts will require terms of service acceptance by the user. Authentication and the Moov.js terms of service Drop are required when collecting terms of service acceptance for these accounts. The terms of service Drop securely captures a user’s platform agreement acceptance which you can then send to Moov.
Explore test mode
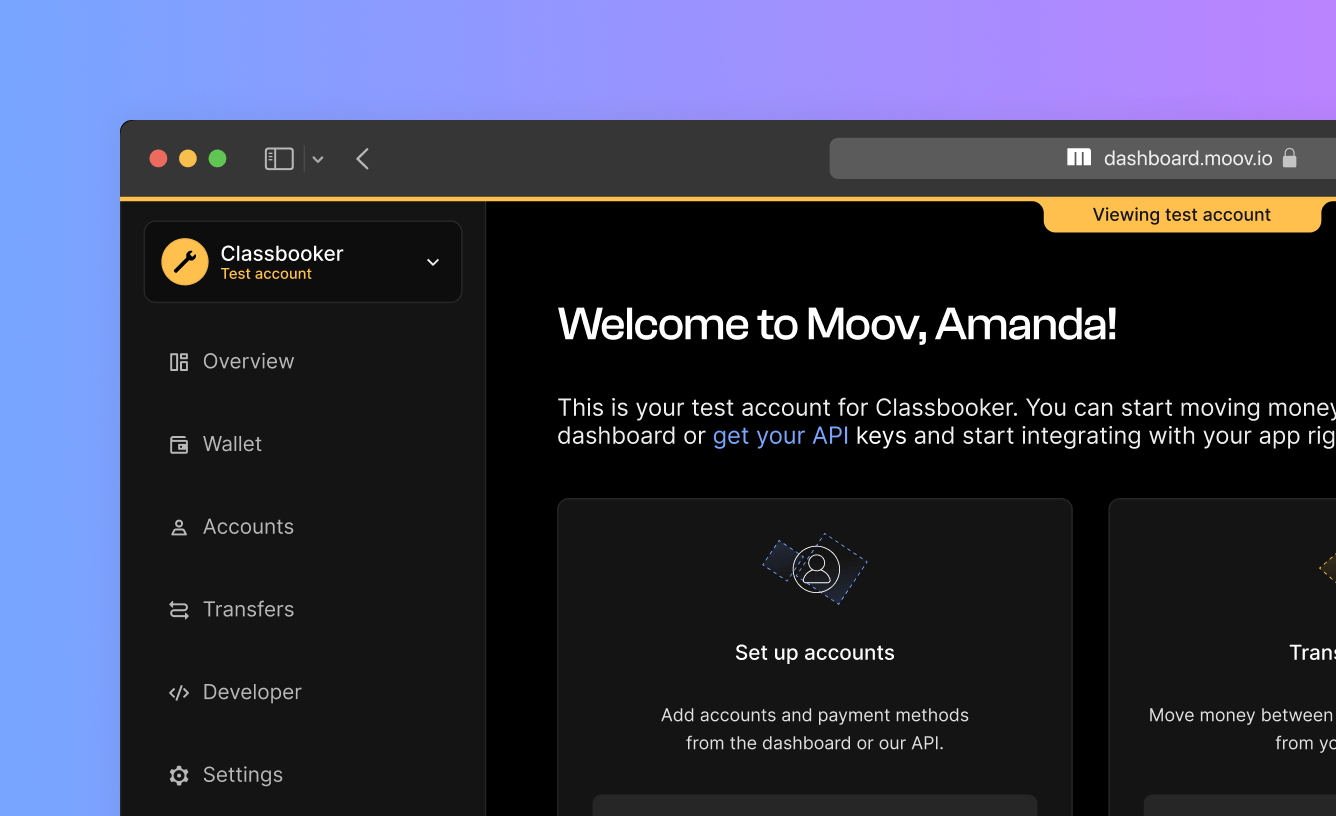
While test mode is optional, we strongly suggest you try it out. After you’ve created an account, test mode with test data will be automatically enabled in the Dashboard so you can explore how the platform works. Make sure you’re in test mode by using the account switcher on the top left.

Try out the following:
- Add a bank account
- Initiate micro-deposits
- Initiate a transfer
- Initiate a return
Read the test mode documentation.
Switch to production mode
When you’re ready to switch to production mode, use the account switcher located on the top left of the Dashboard. Before you start using production mode, make sure to:
- Have your production API key
- Switch out the account ID anywhere it’s hard coded
- Set up new webhook URLs if you used any in test mode
Read the production mode documentation.
Integrate
With a server-side integration, you are responsible for handling and storing sensitive user information. With a client-side integration, you can use Moov.js to streamline interactions with the API, and avoid storing or handling sensitive information yourself.
Server-side: Basic authentication
You can use your API key’s public and private keys with Basic authentication.
Set the Authorization header to Basic <credentials>, where credentials is the Base64 encoding of public key and private key joined by a single colon :.
Client-side: OAuth with JWT
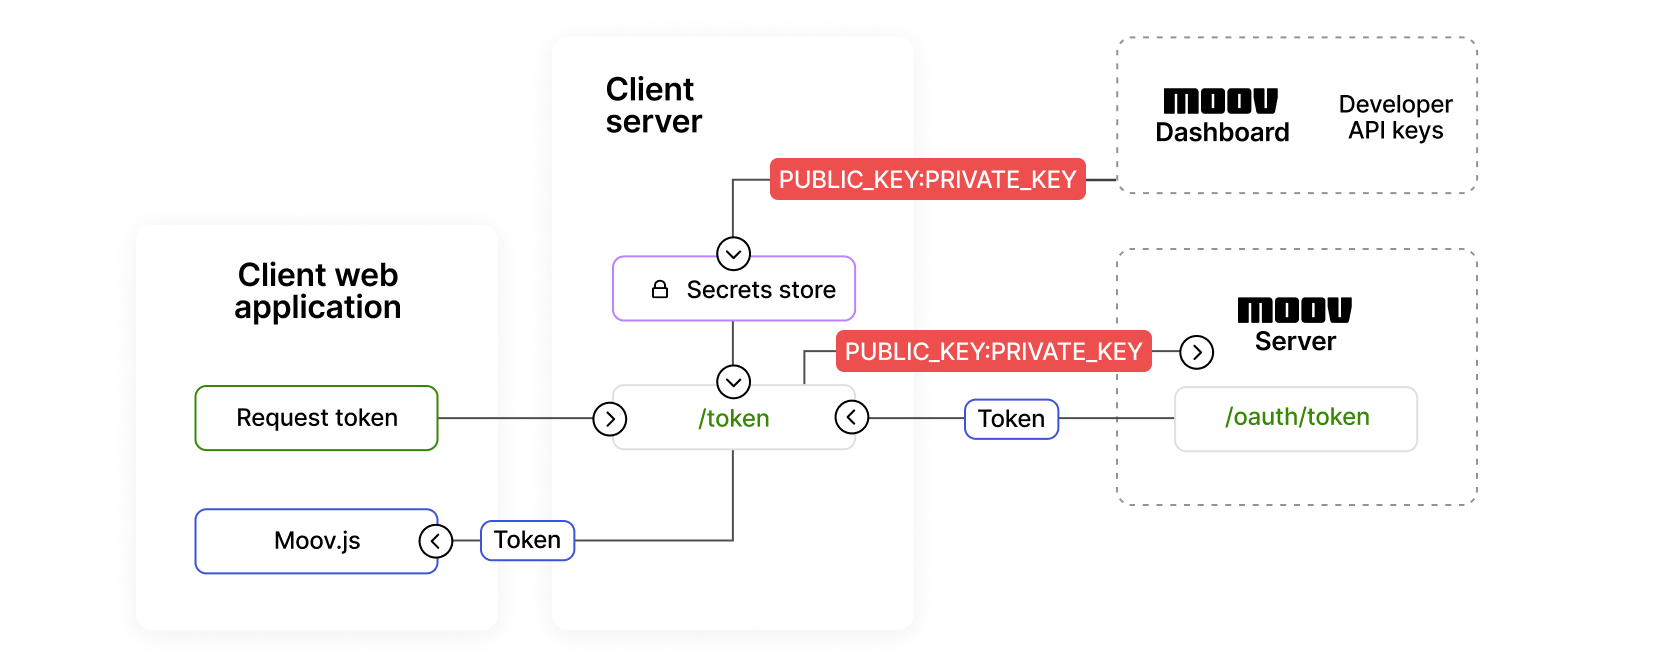
You can set up authentication with OAuth and initialize Moov.js in your application. When making requests to Moov from a browser, you can use OAuth with JSON Web Tokens (JWT).
Understand scopes
A scope is a permission that limits how a specific account can interact with another account. The rest of this guide will reference various scopes that are required for specific actions via Moov.js or any client-side integration.
| Scope | Description |
|---|---|
/accounts.write |
Allows a new Moov account to be created, and view all connected accounts. |
/accounts/{accountID}/bank-accounts.write |
Access to view or add a linked bank account to a Moov account. |
/accounts/{accountID}/cards.write |
Access to view or add a linked cards to a Moov account. |
/accounts/{accountID}/payment-methods.read |
Access to view payment methods for the account specified. |
For the full list of scopes, read the scopes documentation.
Create an access token
Within your server-side application, you’ll generate a single-use access token containing information needed to communicate with your Moov account securely. Once you’ve generated this token, you can send it back to your client to use with Moov.js.

For each action you take you will need a unique short lived access token. The example below generates a token that can create a new account. Moov.js requires the /accounts.write scope.
|
|
|
|
Install Moov.js
You can install Moov.js via NPM, or by including the script:
|
|
|
|
|
|
If you make calls from a browser to Moov without using Moov.js, you can include the access token in the Authorization header.
|
|
Read the Moov.js documentation.
Create an account
To move money, you need to set up Moov accounts. We suggest using our hosted onboarding process when available. If you’d like to link a Moov account to an account in your system, you have the option to pass a foreignID.
The /accounts.write scope is required in order to create the access token. The /accounts/{accountID}/capabilities.write scope to is also required if requesting capabilities during account creation. You can specify capabilities when the account is created, or add them later.
Determine capabilities
Capabilities indicate what an account is able to do. Before you create an account, decide what capabilities you want to request for the account.
Each capability has different data and verification requirements depending on whether the account represents an individual, or a business. Most capabilities also require account holders to agree to Moov’s platform terms of service agreement, which you can initiate using Moov’s terms of service Drop.
The example below creates an account with the transfer capability.
|
|
|
|
|
|
You can also request capabilities after an account has been created. To see all capability requirements, read the capabilities documentation.
Add a funding source
To move funds, you’ll need to add a funding source, such as a bank account or card. Once the funding source is linked and verified, you’re ready to move money. A payment method is automatically created for you when you add a bank account, link a card, or are approved for a Moov wallet.
Generate the access token
Create an access token using your API key following the steps from above. Note that the /accounts/{accountID}/bank-accounts.write scope is required for bank accounts, and the /accounts/{accountID}/cards.write scope is required for cards when creating an access token.
Add a bank account or card
You can manually add bank accounts as shown below, or use MX or Plaid.
To link a customer’s card to their Moov account, you can use the pre-built card link Drop in an HTML document as shown below and include the token you generated in the previous step. Once the information has been submitted, Moov verifies the card details with card networks. You will not be responsible for storing or handling any of the card data, since all PII goes directly to Moov. Alternatively, you can link a card using the POST link card endpoint if you have provided Moov with a copy of your PCI attestation of compliance.
POST endpoint, you can set the optional X-Wait-For header to payment-method and the response will include any payment methods that were created for the newly linked card in the paymentMethods field.
|
|
|
|
|
|
|
|
Initiate micro-deposits
Manually added bank accounts need to be verified through micro-deposits.
|
|
|
|
|
|
Confirm micro-deposits
|
|
|
|
|
|
Read the bank accounts documentation.
Move money
You’re now ready to move money with our API through your servers. Before initiating a transfer, you’ll need to get a payment method. You can get a list of all available payment methods for an account by entering the account ID and the amount of the transfer. For example, you can transfer money from a Moov wallet, or pull funds from another account through ACH debit.
To get a payment method, the /accounts/{accountID}/payment-methods.read OAuth scope is required to create the access token.
|
|
|
|
Finally, to initiate a transfer, provide the two payment method IDs and the amount you want to send.
|
|
|
|
|
|
Next steps
You’ve just moved money! Once you’re set up, you can continue to make transfers or accept payments.
Use the Moov Dashboard to:
- Customize account settings
- Add team members
- Manage roles and permissions
We also suggest you consider doing the following:
- Subscribe to webhook events
- Explore the API reference
- Embed pre-built Moov.js UI Drop components
FAQ
- I’m getting a 401 unauthorized error while making an API call. How should I troubleshoot this?
- There could be a number of possible reasons for a 401 unauthorized error. Troubleshoot the error by making sure you have:
- Generated an access token that you have included in your request header
- Generated the terms of service token and patched the token to the account
- Checked that your scopes are correctly set for Moov.js or a client-side integration
- Configured your API key to include the domain you’re making a request from
- Included your domain in the
originandrefererheaders
If you are still getting an error, please write a support ticket and provide the
x-request-idresponse header from your request so our team can troubleshoot further. - I’ve received a CORS error or failed request. What do I do?
- To troubleshoot a CORS error or a failed request, make sure to check you’ve done the following:
- Sent your request coming from a secure
httpsdomain. Note thatlocalhostis not secure, even if it displays ashttpsin your browser. - Included the domain sending the request in the allowed domain list for your Moov API key
- Generated an access token that includes all the required scopes for your request from Moov.js or a client-side integration
- Included the generated access token in your request header
- Sent your request coming from a secure