Payment links
Navigate to Payment links in the Dashboard. You can view your payment link history or create a new payment link.
Before you send your first payment link, you have the option to set up brand colors. Click on the Brand settings button to set light and dark mode colors for your payment links.
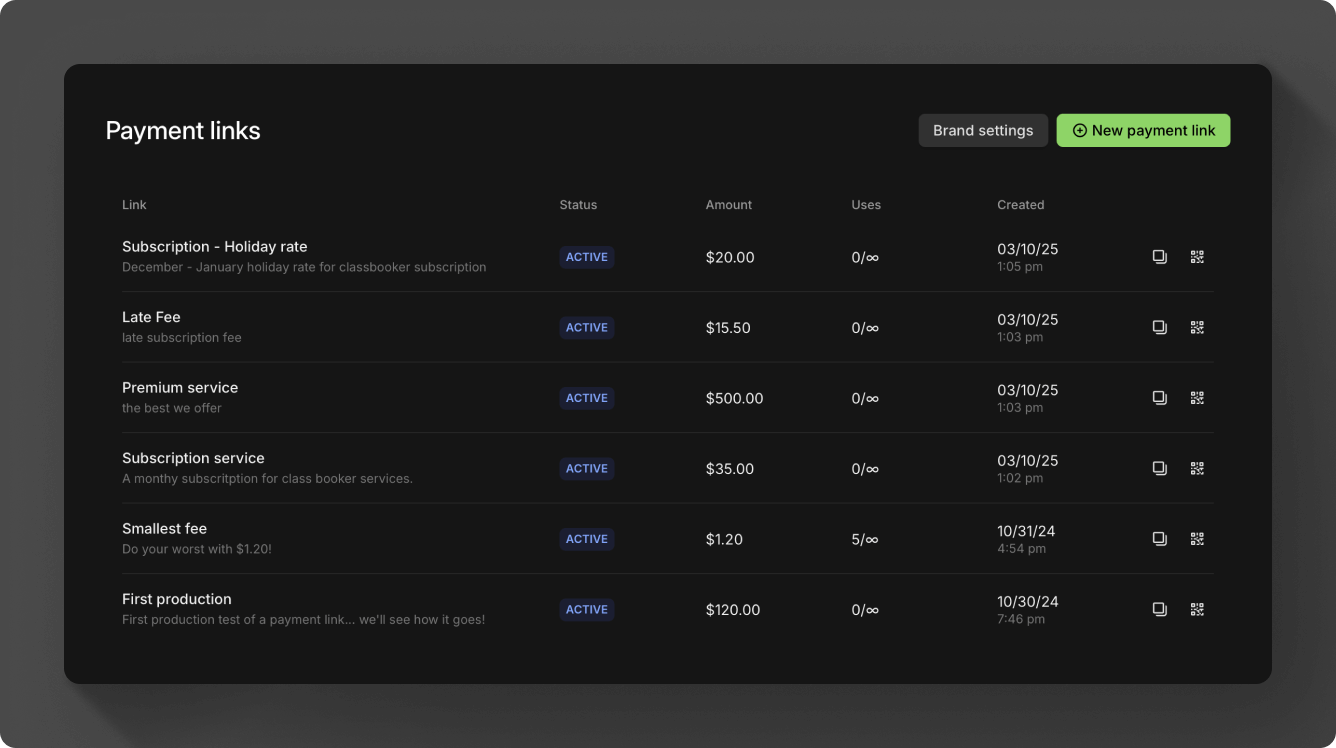
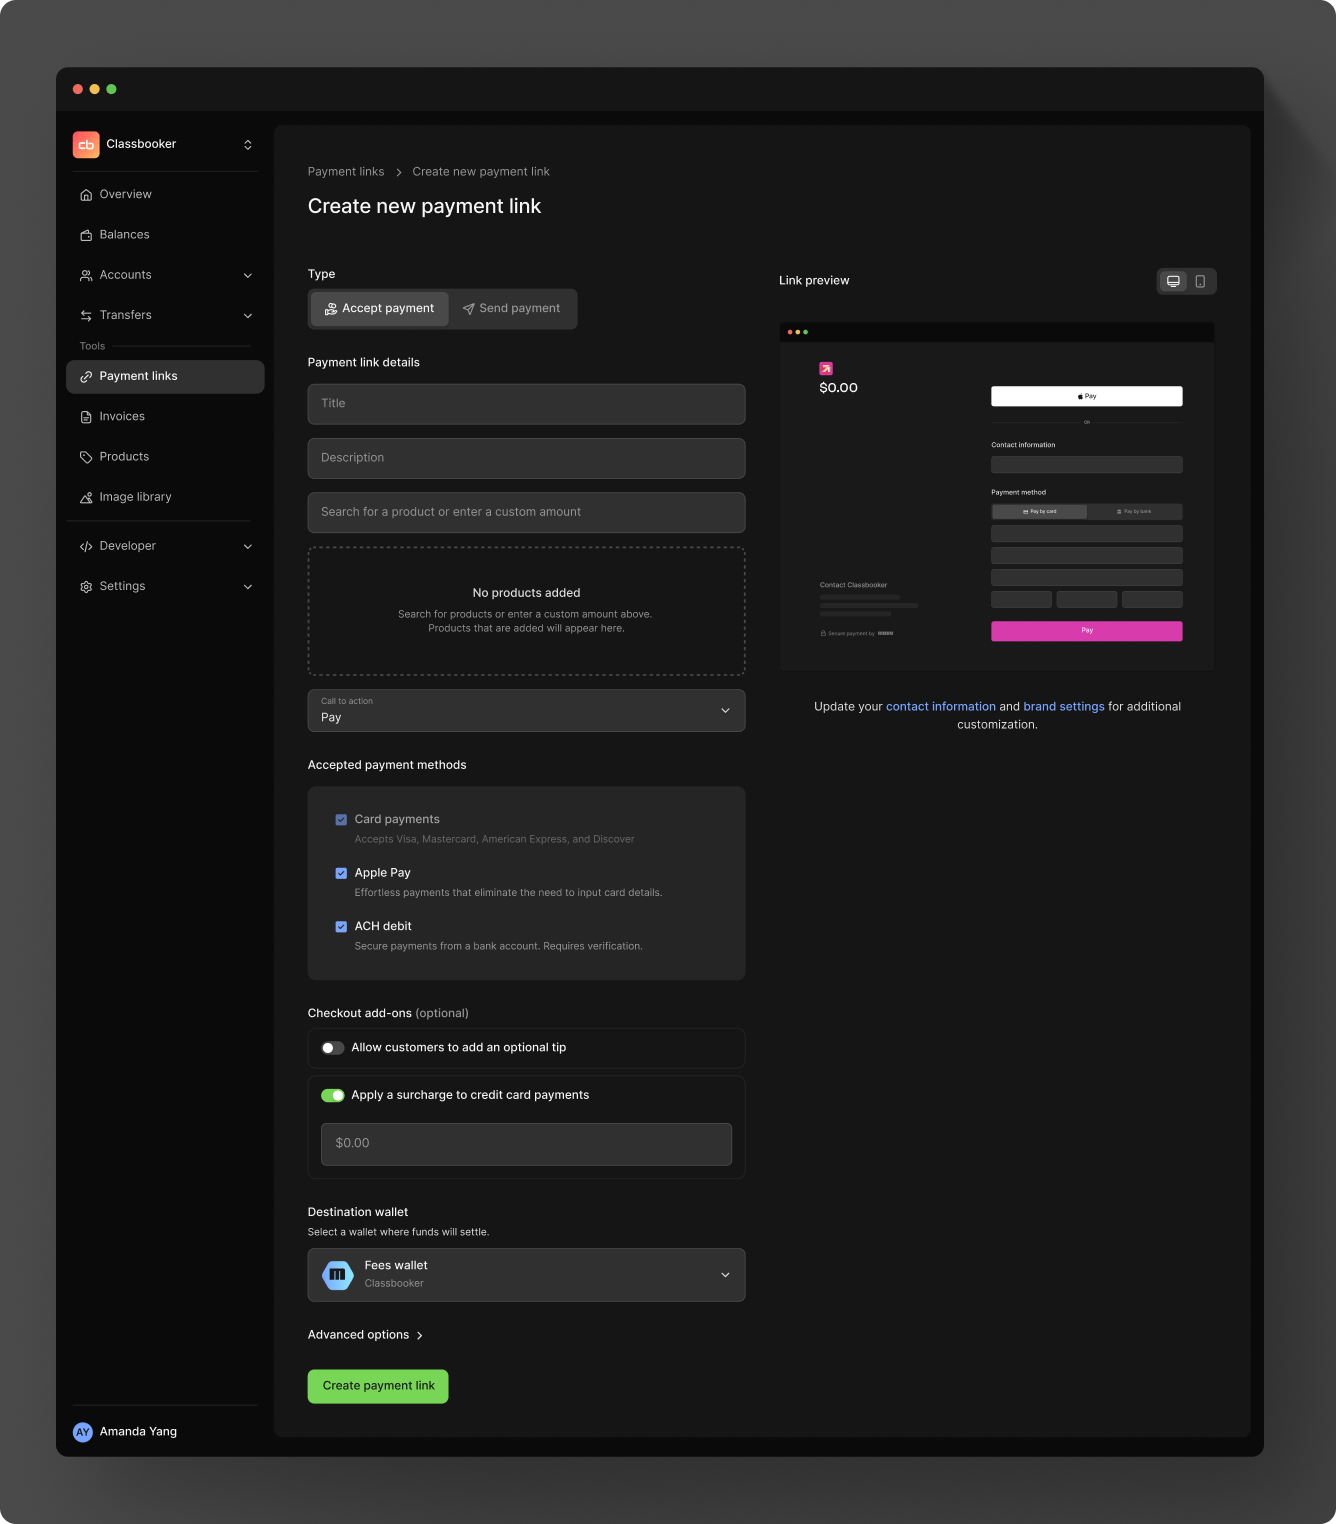
Create a payment link
Click the New payment link button and choose either the Accept payment or Send payout tab to create a link. Choose the amount and provide a title and description. Choose a product from your catalog, or enter an amount.
If you're sending a payout, you'll also need to provide a phone number or email address for the recipient. The recipient will receive a verification code to the chosen contact method.
Select the payment methods you would like to allow. By default, all payment methods are selected:
| Accept methods | Send methods |
|---|---|
| Card payments | Push to card |
| Apple Pay | RTP credit |
| ACH debit | ACH credit same day |
| ACH credit standard |
Then select the wallet you would like to accept or payout the funds to. Additionally, when accepting a payment, you can specify one of the following calls to action:
- Pay
- Subscribe
- Book
- Donate
User defined amounts
Instead of choosing a product or entering an amount, you can let the end-user choose the amount to pay or receive. With this option, you can set a minimum and maximum range, as well as select up to five suggested amounts. If either minimum or maximum is omitted, the limit for that end is open.
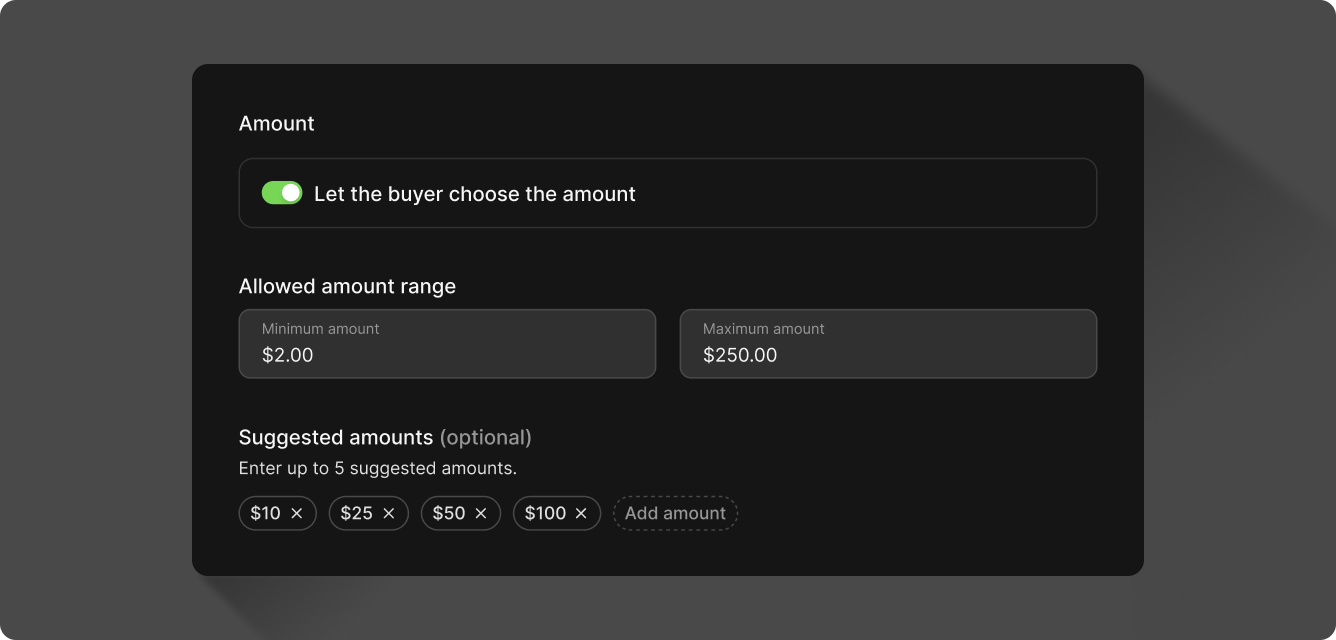
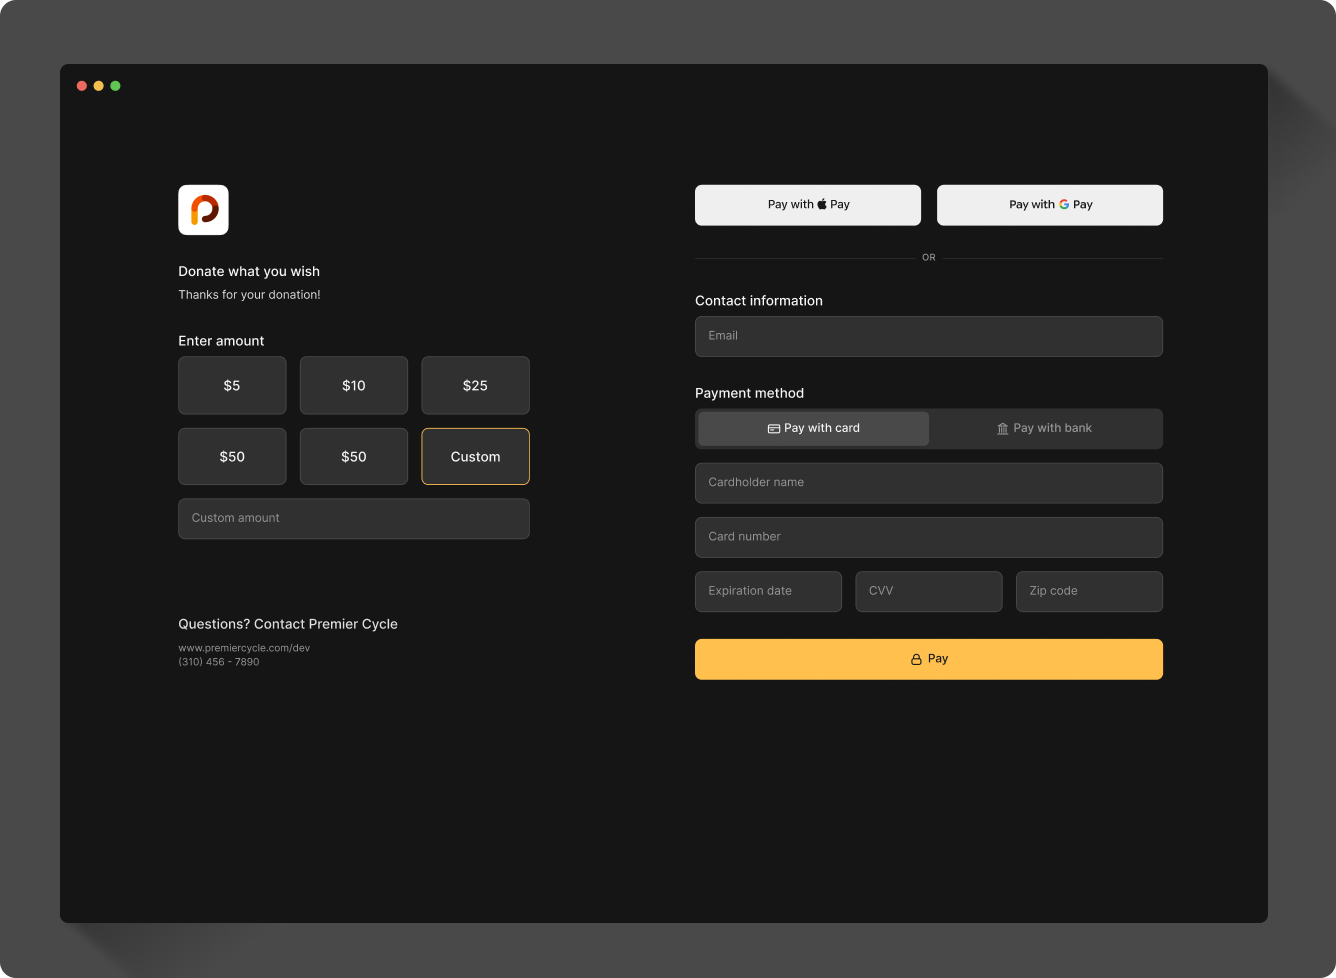
The user will see the options in their checkout process.
Tax
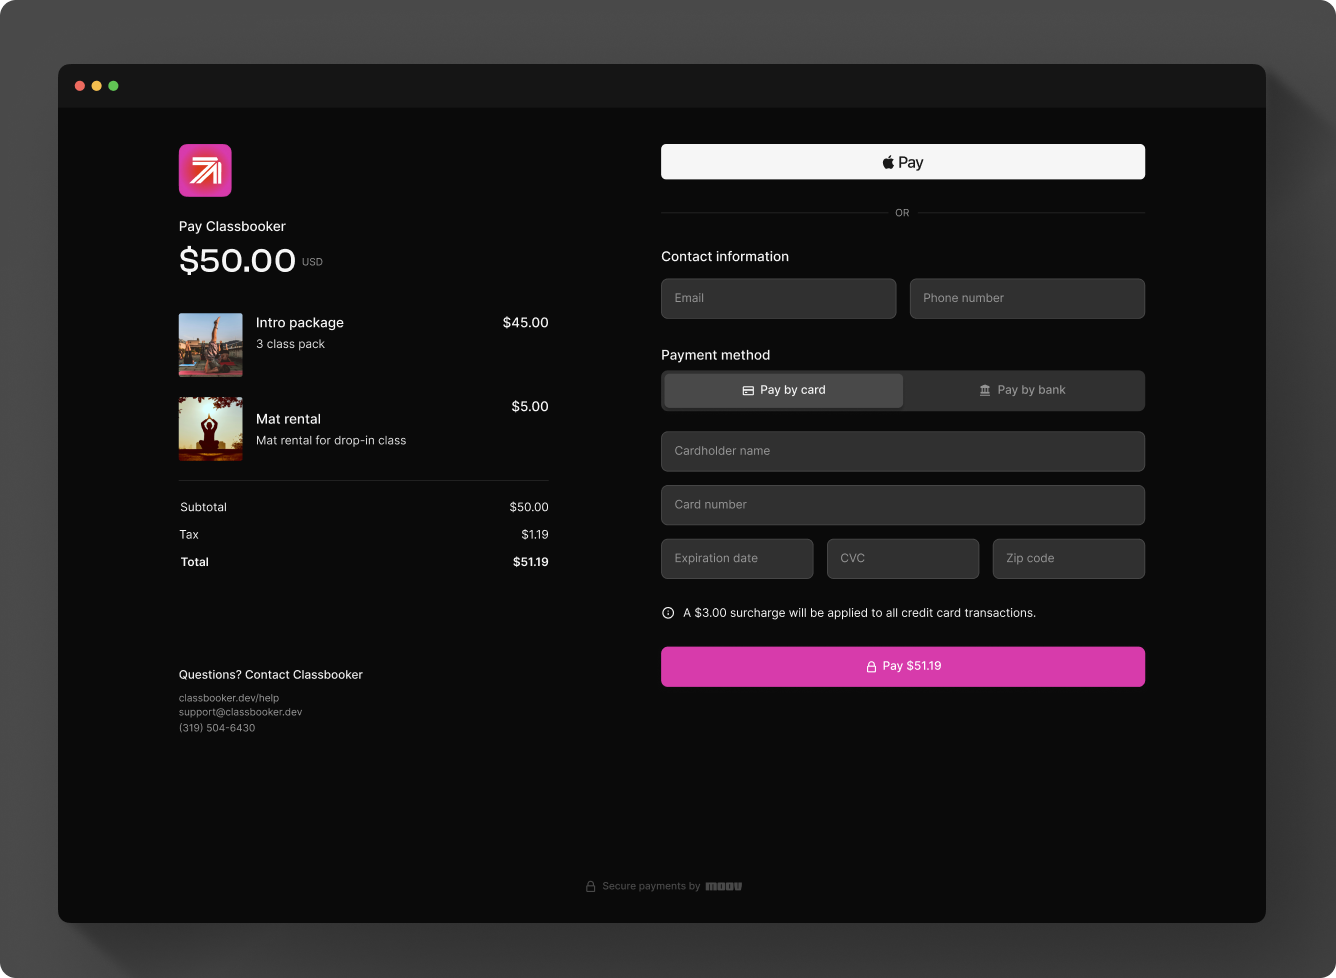
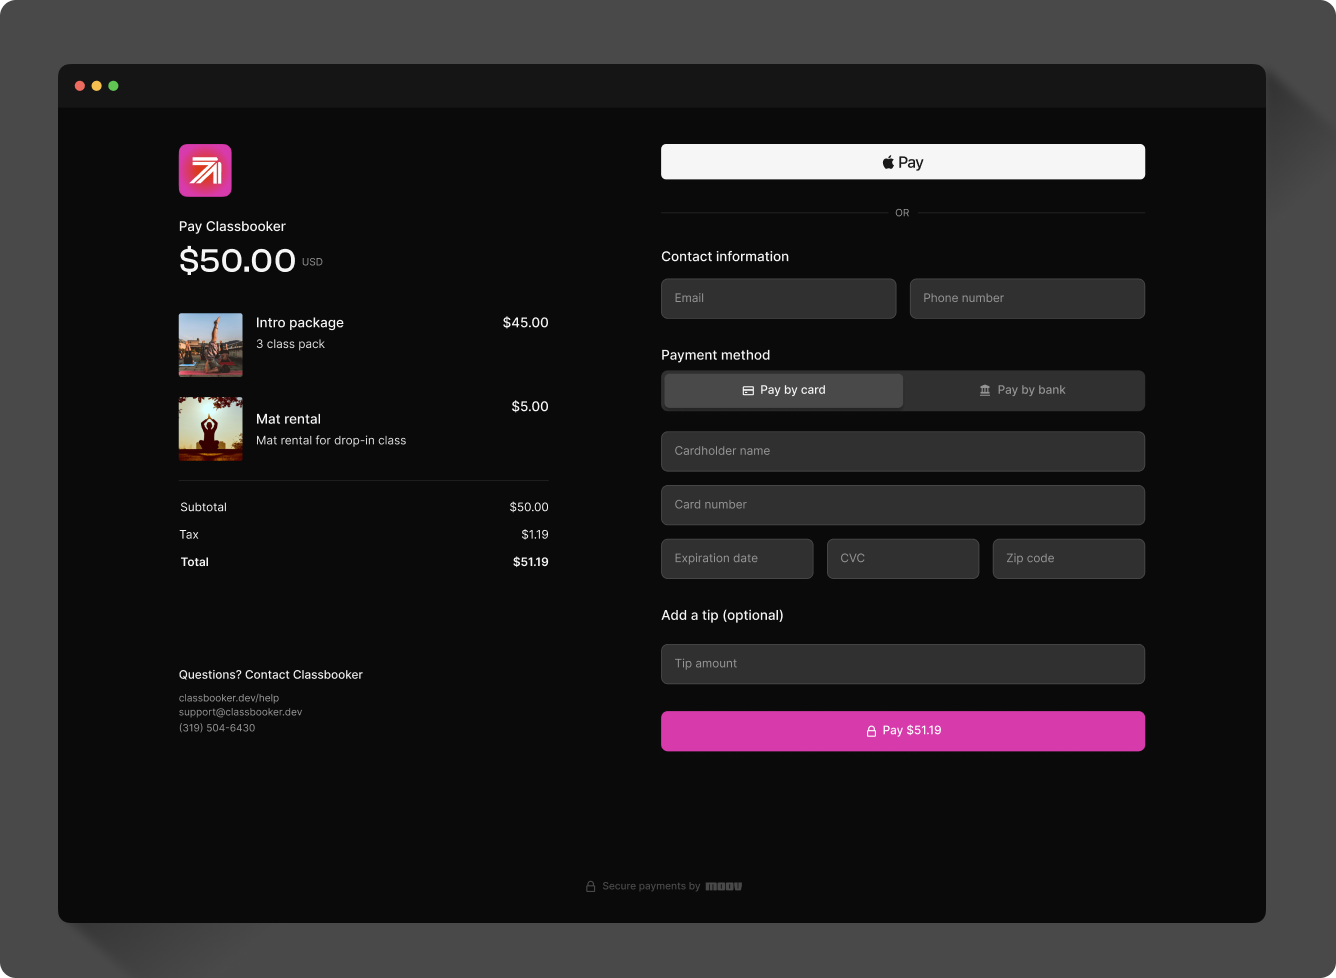
When you select a product or enter a free-form amount, you'll see Subtotal, Tax, and Total appear. You can click the edit icon next to Tax to manually add a tax to the item.
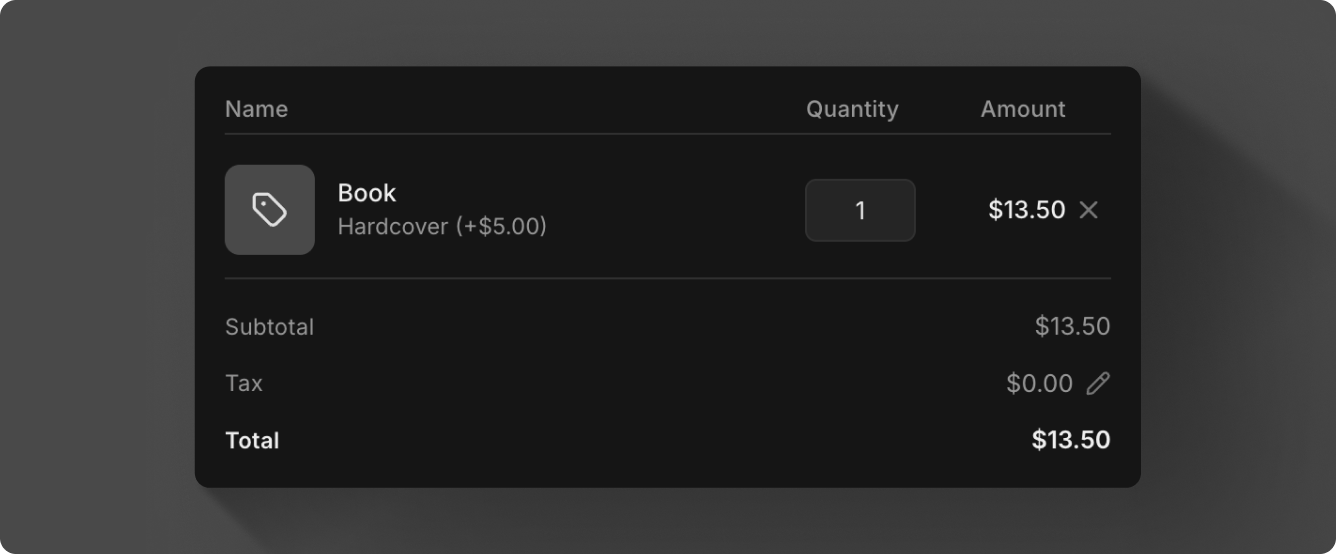
Tax is not available for payment links with user defined amounts.
Surcharging
Surcharging is optional for credit card transactions, but if enabled, the account must follow card brand caps, as well as additional card network rules and state and federal regulations. See the main surcharge guide for details on compliance, disclosures, and regulations.
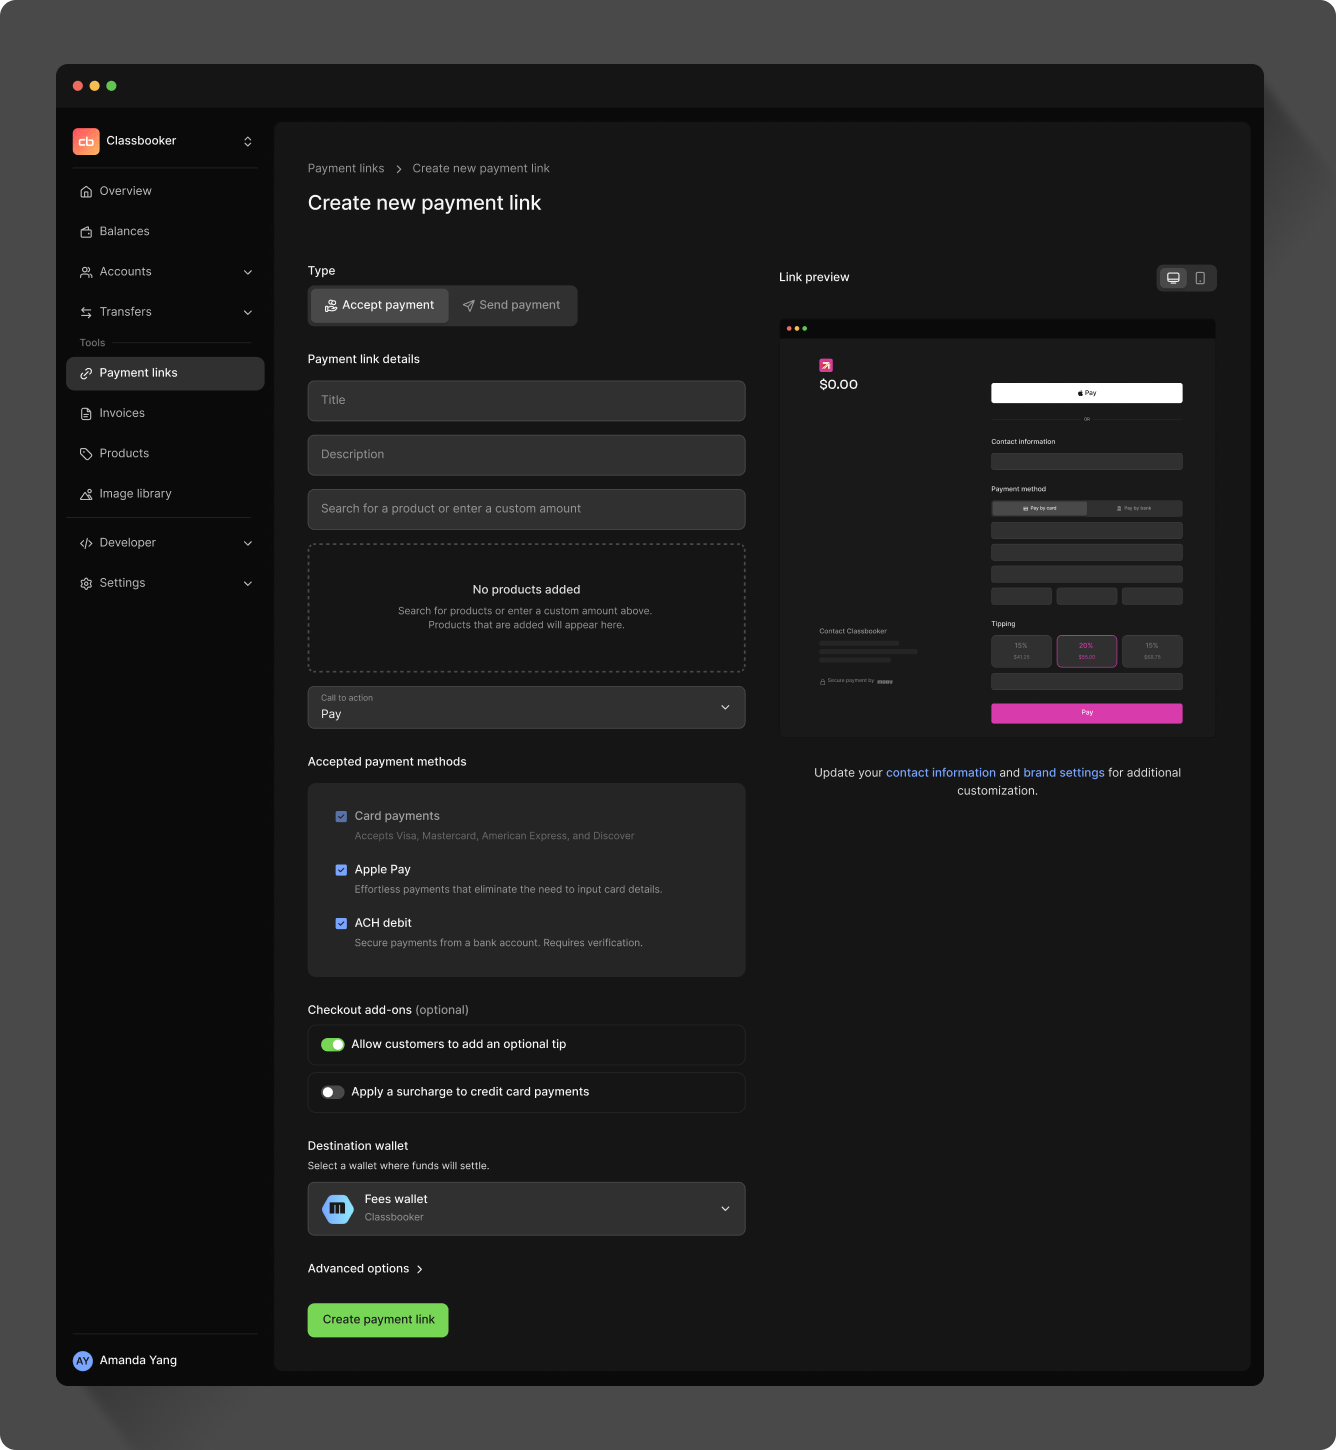
When creating a payment link, under Checkout add-ons, you can enable surcharging and enter the amount to add to the transaction.
When the customer views the payment request, the surcharge fee will be shown along with a disclaimer near the Pay button.
Transactions including a surcharge can be refunded with either the full surcharge amount or a partial surcharge amount.
Surcharging is not available for payment links with user defined amounts.
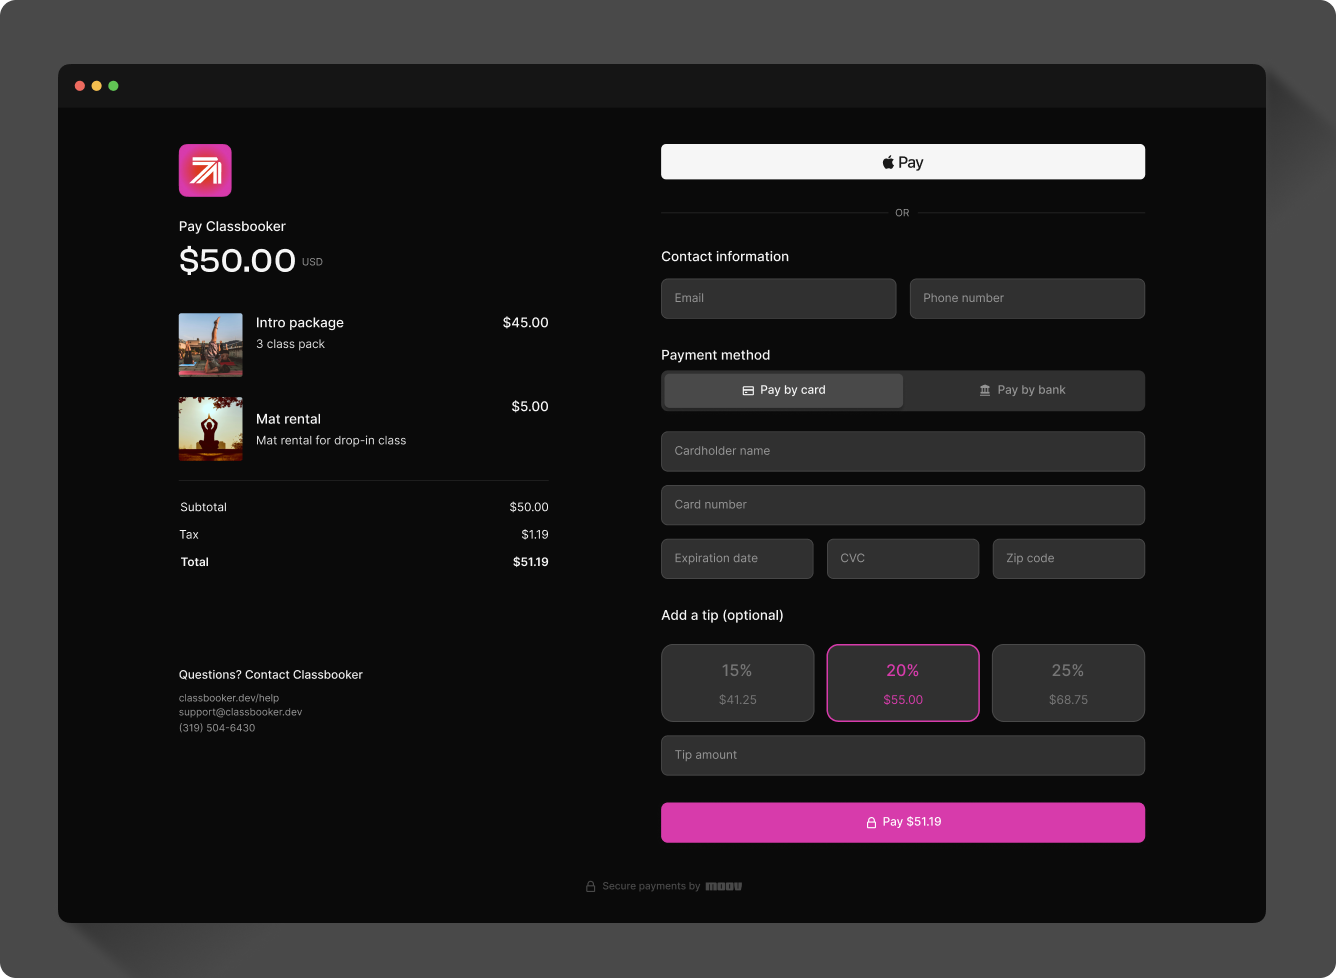
Tipping
When creating a payment link, under Checkout add-ons, you can enable tipping. If tipping presets have been set, the customer will see three preset options (percentage based or set amounts) as well as a free-form, custom option.
You can also enable tipping for each of your merchants in their account settings.
If tipping presets have not been set in your main settings and you enable tipping, the tip field will only show the free-form option. Tipping is always optional for the customer.
Tipping is not available for payment links with user defined amounts.
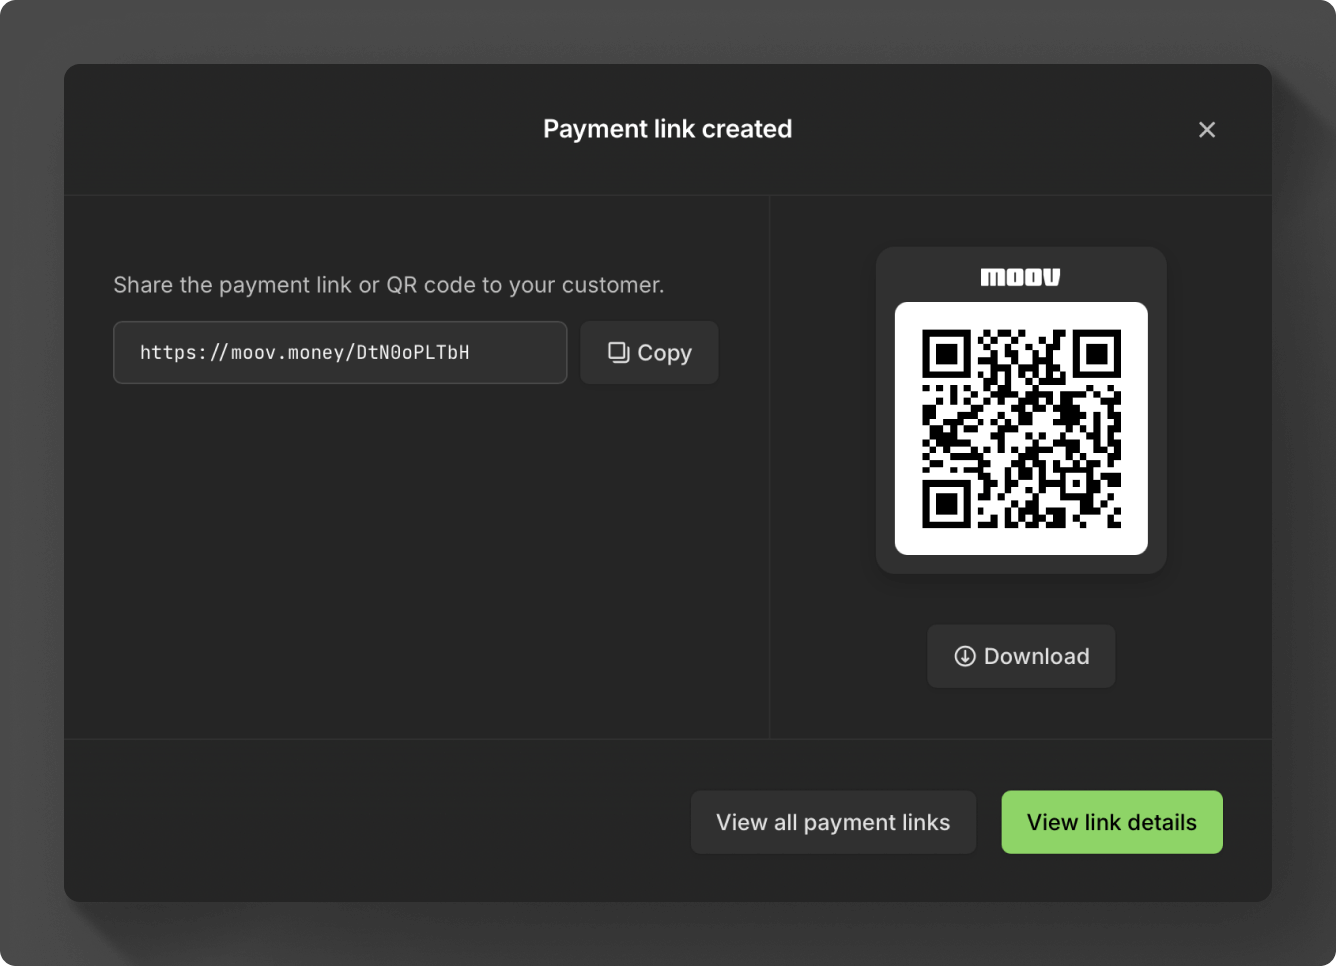
Sharable link & QR code
After you create a payment link, you'll be presented with a sharable link and QR code that can be scanned in-person.
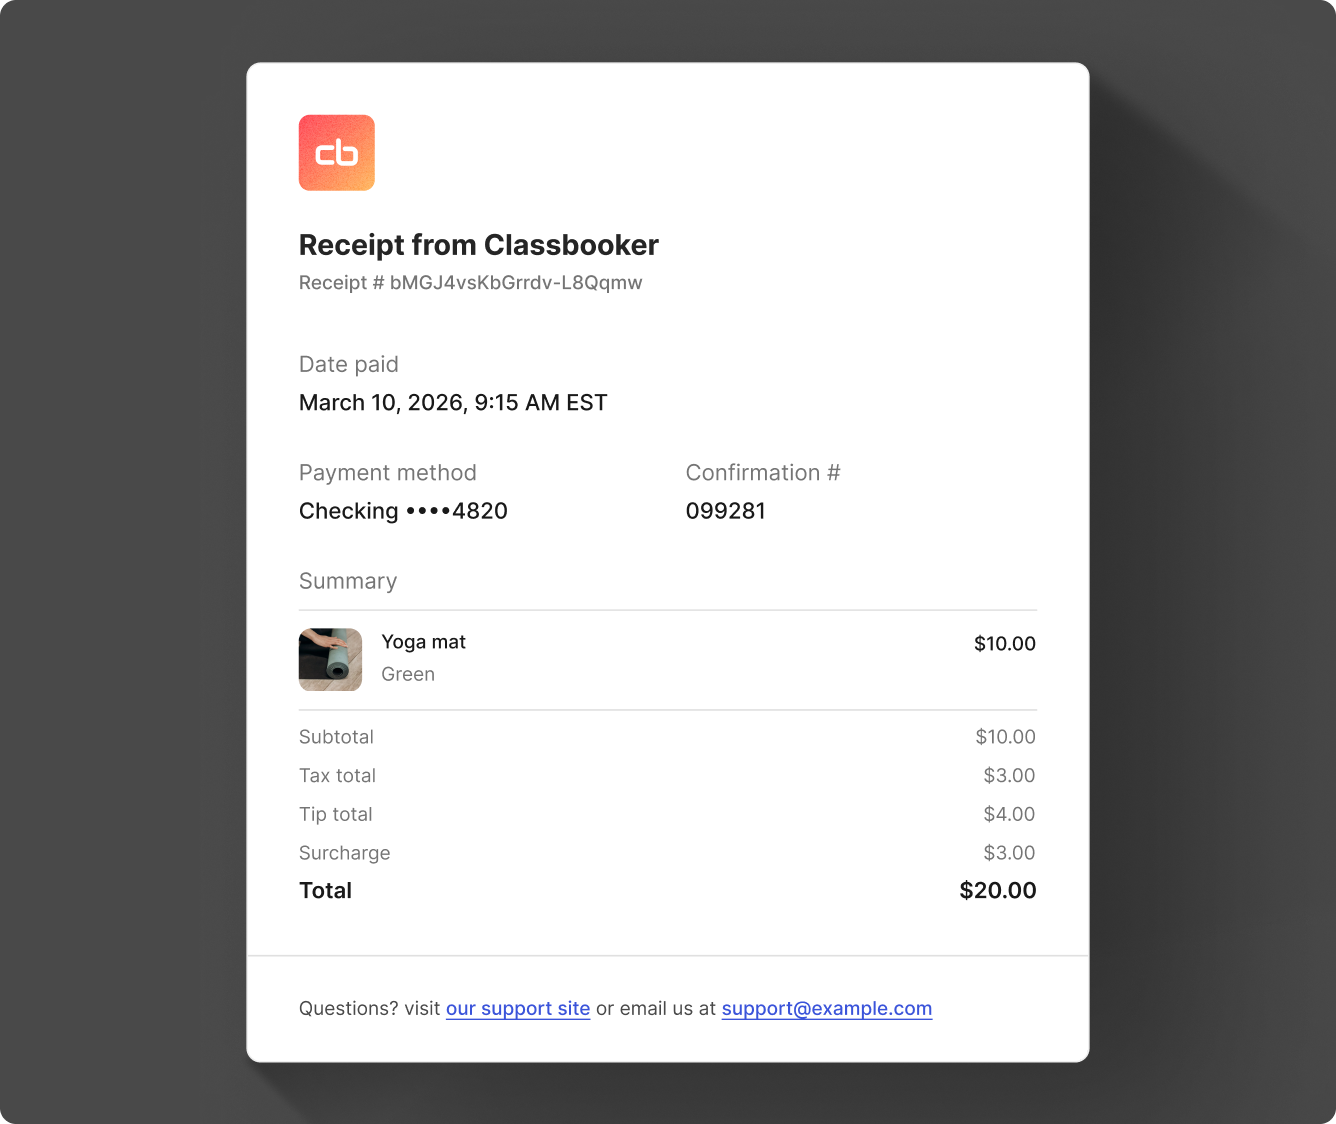
Receipts
When a payment link is successfully submitted, a receipt will automatically be created and sent via email using the transfer ID and the email/email accountID ID. The payment link's title is passed along in the transfer description and will appear on receipts. Additionally, any optional charges like tips and surcharges will appear on the receipt.
View & edit payment links
When you select a payment link, you can view details, copy the link, and view the QR code. Selecting More actions will allow you to edit the details or delete the payment link.
Only the account that creates the payment link can update the payment link, if needed. For example, if a merchant creates a payment link, only the merchant account has access to update that payment link.
Peek preview
The peek preview shortcut gives you fast access to details in the Dashboard.
Press the space key to toggle the preview on and off. You can move your cursor up and down the list and the preview will update with the corresponding payment link details. The esc key will also dismiss the preview.
Press c while the preview is open to copy the accountID to your clipboard.