Dashboard quick start
This guide focuses on the quickest and easiest way to get set up with a partner account and create your first connected account with Moov - through our Dashboard. Within the Dashboard you can send secure onboarding links and create payment links to facilitate payments and payouts.
After setting up your own account, you can add and connect additional business and individual accounts to your Moov account. Read through our Dashboard specific documentation, which brings you through each section of the Dashboard UI:
Once you're up and running, most operations can be completed in the Dashboard, however, some complex operations and features may need to be supplemented with the API. Read through the documentation site to learn more. Additionally, check out our glossary for a list of terms and concepts associated with Moov.
Sign up for Moov
You can sign up for Moov right in the Dashboard and use test mode with no commitment. If you want to move real money and onboard real business accounts, you'll need to go through verification, underwriting, and sign a contract with Moov before you'll be approved for production access. See the account requirements section for more information, or contact Moov to get the verification process started.
An individual with Moov administrator or developer permissions is required to take the actions laid out in this guide.
Create API keys
To use Moov's API, you'll need to generate keys. In the Dashboard, navigate to Developers and click the New API key button. Test mode and production mode each require their own API keys. To create an API key:
- Name the API key (we suggest giving it a name that relates to the purpose)
- Make sure to copy the key and save it in a secure place
- Add any domains you'll use for testing and production
- Optional: Include a note to remind you where the key is stored
If you're ready to jump into production mode, make sure to take any necessary precautions if you've previously been using test mode.
Read the API keys documentation for more information.
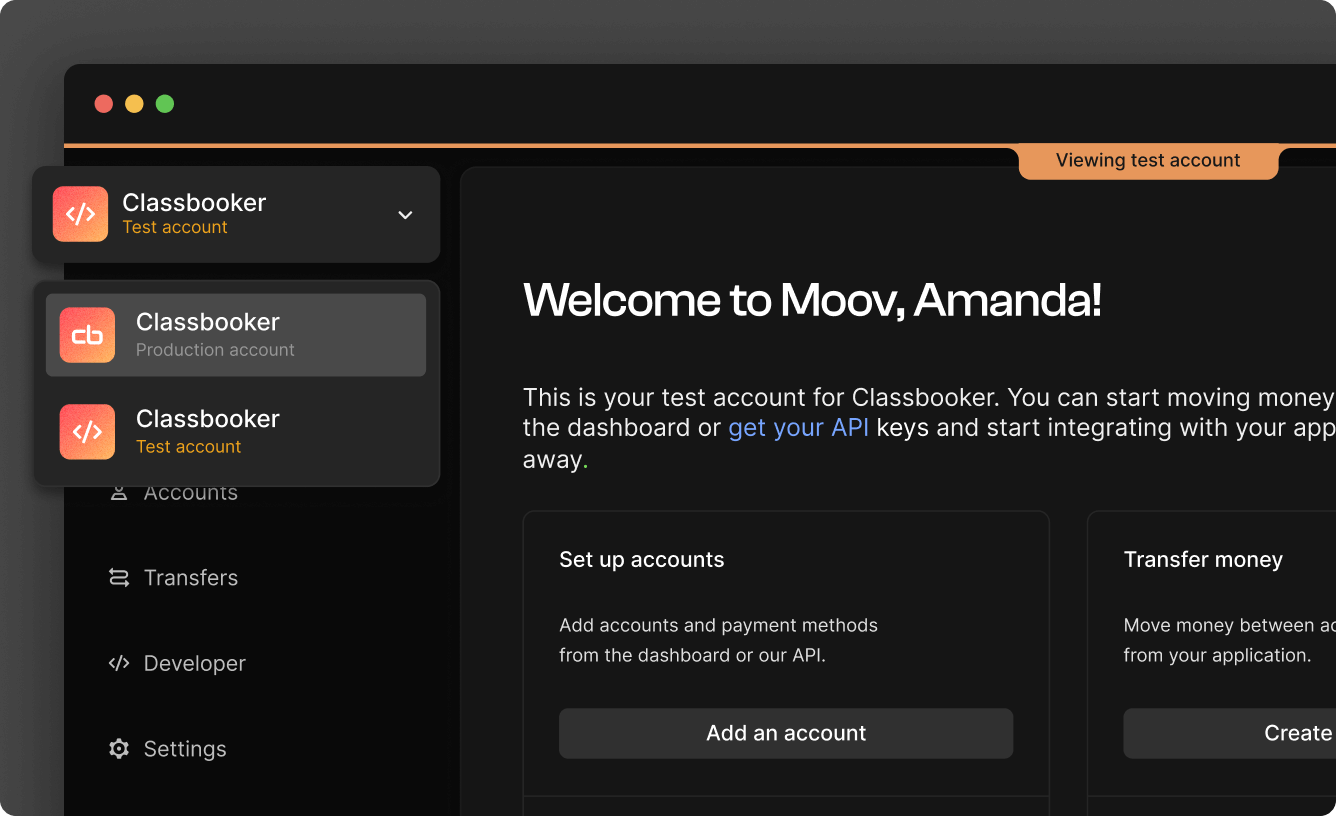
Explore test mode
In test mode, test data is automatically enabled in the Dashboard, which allows you to explore how the platform works. Make sure you're in test mode by using the account switcher on the top left of the Dashboard view.
Try out the following:
- Add a bank account
- Initiate verification
- Initiate a transfer
- Initiate a return
Switch to production mode
When you're ready to switch to production mode, use the account switcher to change modes. Before you start using production mode, make sure to:
- Have your production API key
- Switch out the account ID anywhere it's hard coded
- Set up new webhook URLs if you used any in test mode
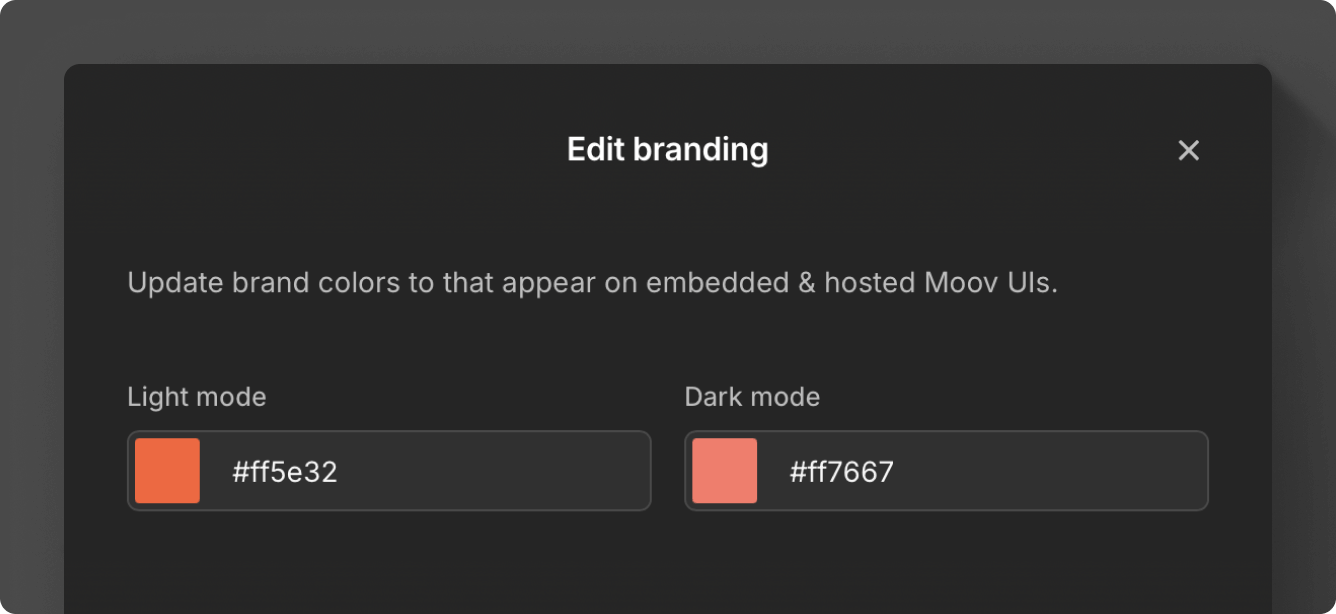
Set brand colors
In your business detail settings, you can select light and dark mode brand color settings.
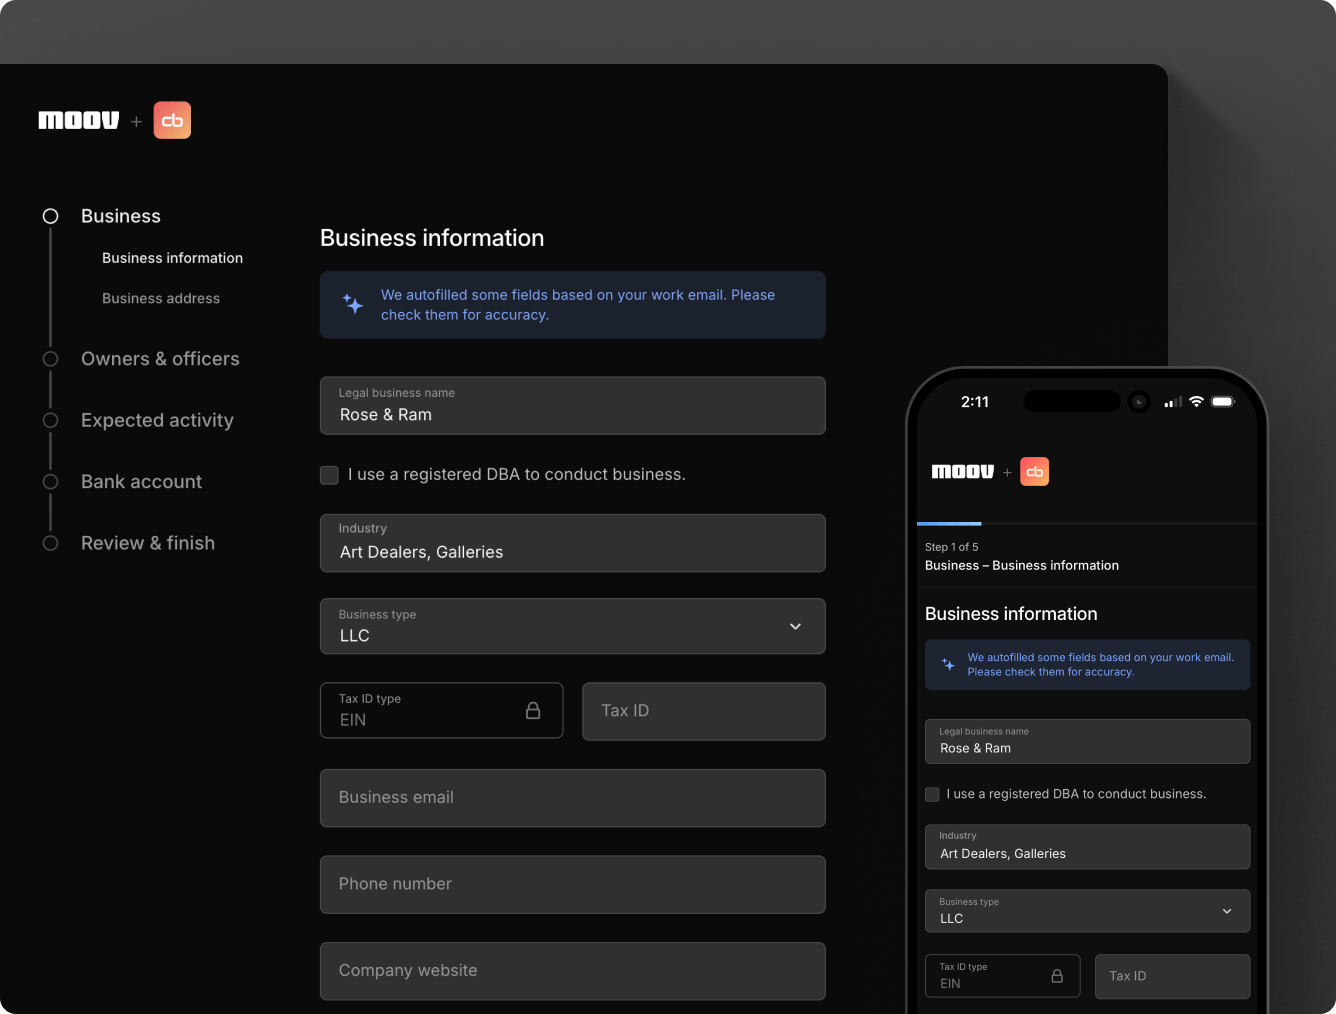
Onboard with hosted onboarding
Moov's hosted onboarding flow allows you to select capabilities, scopes, pre-fill existing information, and select a fee plan before sending a link to a secure session to finish the sign up process. The new account holder can be redirected to your app upon completion.
You'll pre-fill information and send a branded secure session link to the account owner. The business/merchant can start and pause the process, picking up where they leave off. During the process, the account owner will give you permission to perform actions on their behalf, as well as agree to the terms of service agreement and pricing disclosure.
Any account onboarded through Moov's hosted onboarding process will have access to their own Dashboard. You can send a support guide to the account owner so they'll know what information and documents to gather ahead of time.
All personally identifiable information (PII) goes straight to Moov, so you won’t be responsible for storing or handling sensitive user data.
Select Capabilities
Capabilities indicate what an account is able to do. Before you begin the hosted onboarding process, decide what capabilities the account will need:
- Transfer: Authorize debit transfers
- Wallet: Store funds with Moov
- Send funds: Send funds to another account
- Collect funds: (business accounts only): Collect funds from another account
- Card issuing beta: (business accounts only): Provide a virtual card to an account
Send funds and collect funds have multiple capabilities that can be requested per use case. For faster verification, only request required capabilities. For example, if an account is only interested in processing RTP payouts, only request the Send funds instant bank capability.
Each capability has different data and verification requirements depending on whether the account represents a business or individual. You should familiarize yourself with capability requirements before moving on to the next step.
See our capabilities section for more information.
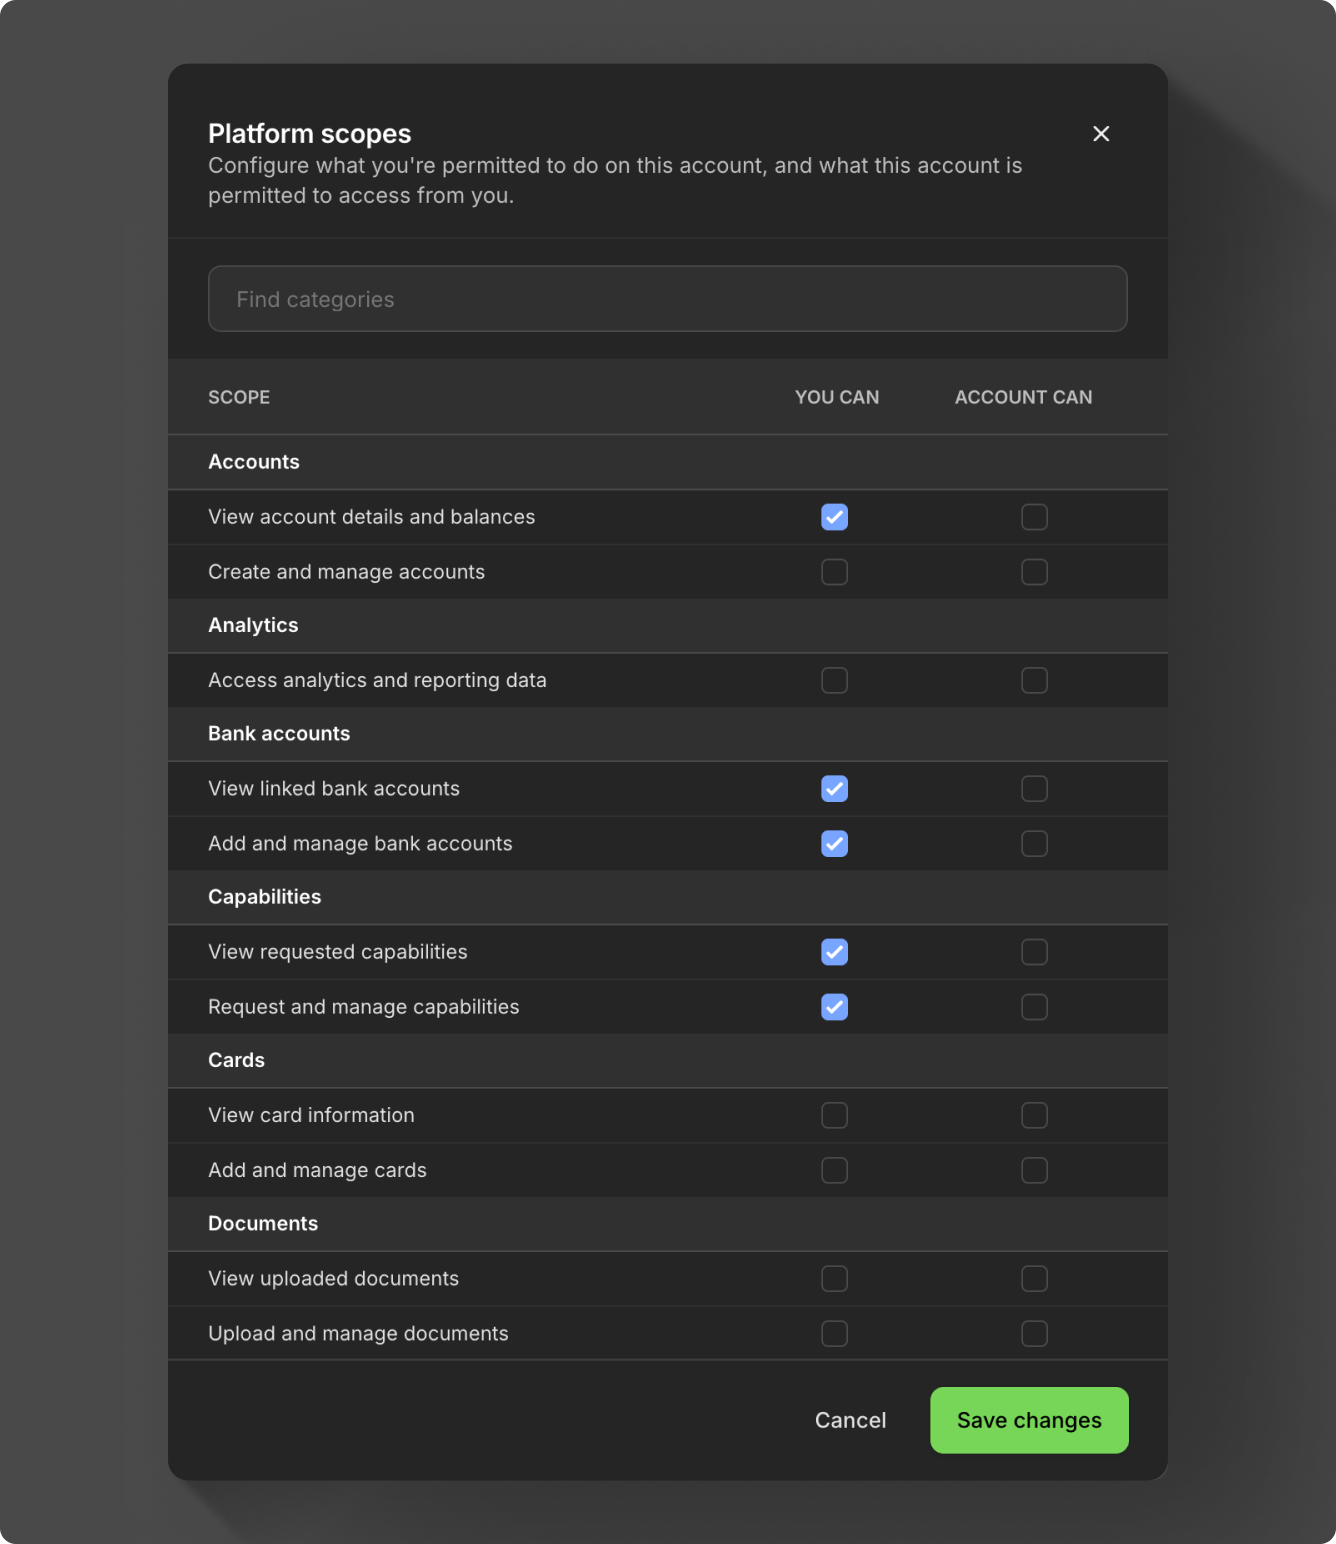
Select scopes
Scopes specify what actions an account can take on Moov's platform. When you choose to enable certain scopes for an account, you create connections between your account, the business/merchant account, and the account's customers. You have the option to choose a set of scopes for your partner account and a set of scopes for the account.
Available scopes:
- View account details and balances (pre-selected)
- Create and manage accounts
- Access analytics and reporting data
- View linked bank accounts (pre-selected)
- Add and manage bank accounts (pre-selected)
- View requested capabilities (pre-selected)
- Request and manage capabilities (pre-selected)
- View card information
- Add and manage cards
- View uploaded documents
- Upload and manage documents
- View uploaded files
- Upload and manage files
- View business representatives
- Add and manage representatives
- View enriched profile information
- View the account's profile (pre-selected)
- Edit the account's profile (pre-selected)
- View available payment methods (pre-selected)
- View transfers (pre-selected)
- Initiate transfers (pre-selected)
- View wallet balances (pre-selected)
- View Apple Pay merchant details
- Manage Apple Pay merchants
- View Apple Pay registration
- Register and manage Apple Pay
- View issued cards
- Issue and manage cards
- View secure issued card details
- Access federal network data
- ping read
- profile disconnect
Moov preselects some scopes based on general usage of Moov's platform. Select Edit scopes to enable a different set of scopes for the connected account.
Moov maintains strict access controls when a partner account shares scopes with another account. While a partner gains visibility across every connected account, businesses can only access their own customers.
Moov maintains strict access controls when a partner account shares scopes with another account. While a partner gains visibility across every connected account, merchants can only access their own customers.
See the connected accounts guide for more information.
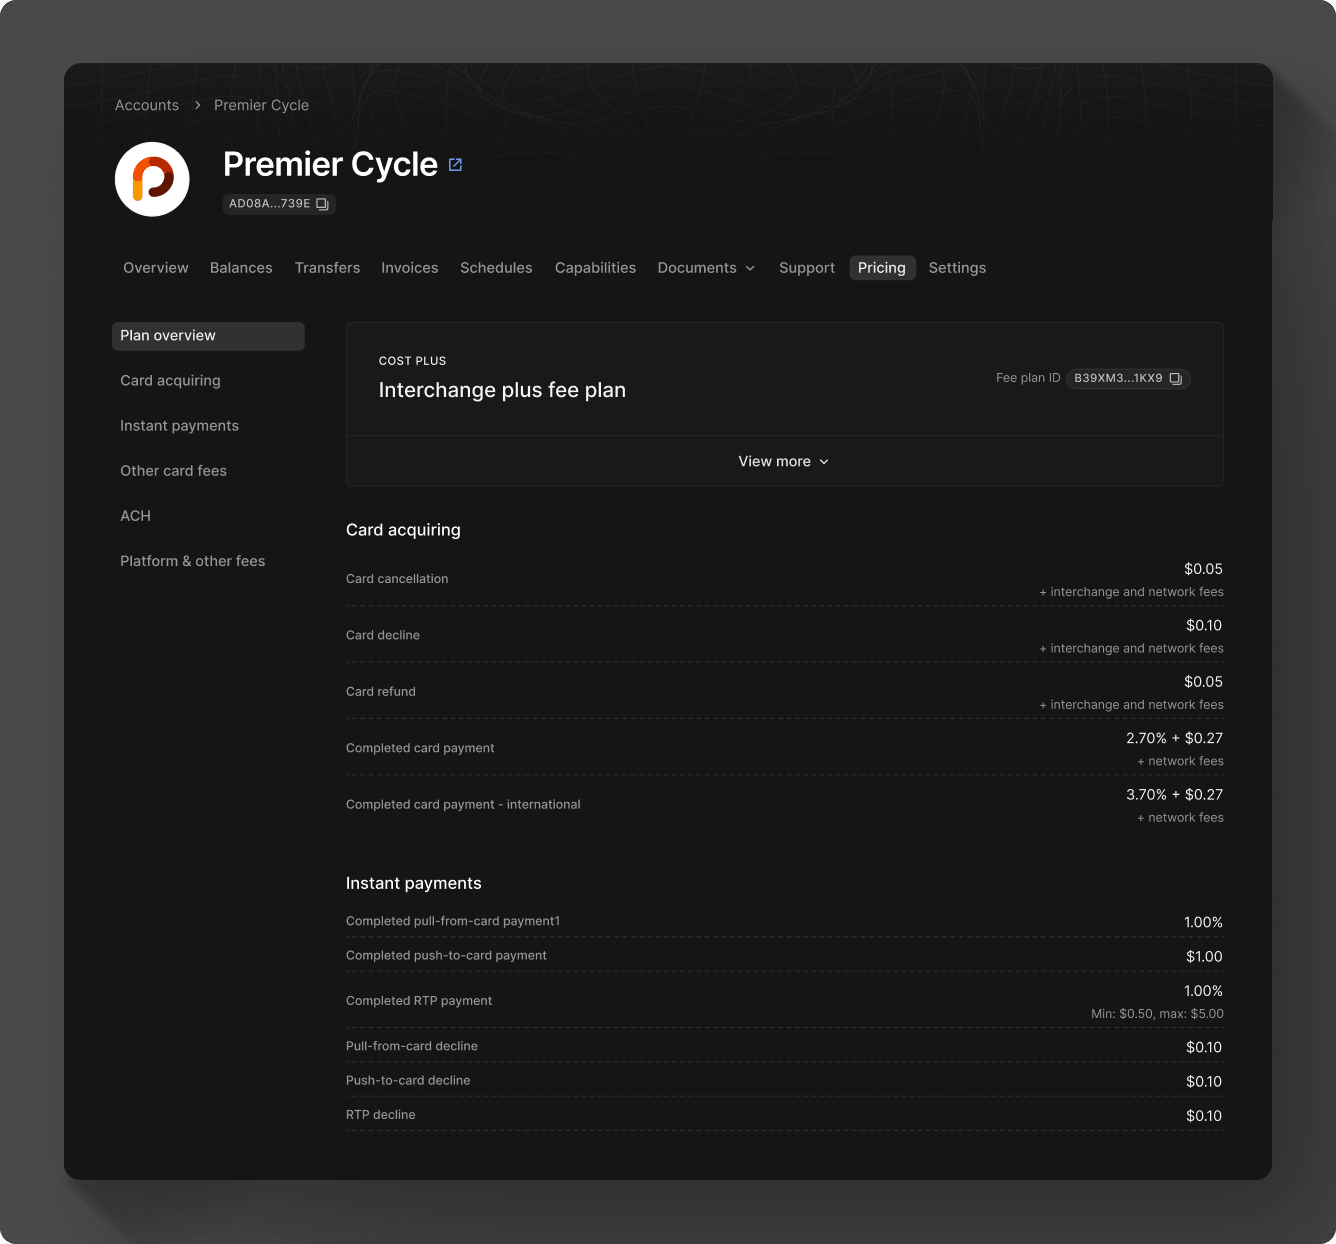
Select pricing fee plan
During the onboarding process, you'll also choose a fee plan for the account, which they will agree to as part of their terms of service platform agreement. After selecting a plan, the pricing disclosure will show the rates for the following:
- ACH
- Instant payments (AFT, OCT, RTP)
- Card acquiring
- Transaction management fees
- Platform fees
- Network fees
With a cost plus plan, card networks’ interchange fees and Moov’s processing markup are passed along to the account. With a flat rate plan, you can lump all the processing fees together with a flat rate customized for each account.
When you create a fee plan, you can use it once, or reuse it and assign it to many accounts. A new account must accept the fee plan and enter into a fee agreement before it can go into effect.
See our pricing guide for more information and details on billable events. When you're ready to send the link, create the link and send it via email or SMS. A new account must accept the pricing fee plan and agree to the terms of service and pricing disclosure before the plan can go into effect. You are responsible for any communication regarding pricing models.
Create & send onboarding link
When you're ready to send the link, create the link and and send it via email or SMS. A new account must accept the pricing fee plan and agree to the terms of service and pricing disclosure before the plan can go into effect. You are responsible for any communication regarding pricing models.
A new account will be asked to provide bank details to set up a funding source. Moov will send a small deposit with a verification code to verify the bank account instantly, if eligible. If the bank doesn't support instant verification, Moov will automatically use same-day ACH instead of RTP for verification. ACH verification may take 1-2 days.
You can track the status of an account's application by navigating to the onboarding links section of the Dashboard. Visit our onboarding links guide for more details.
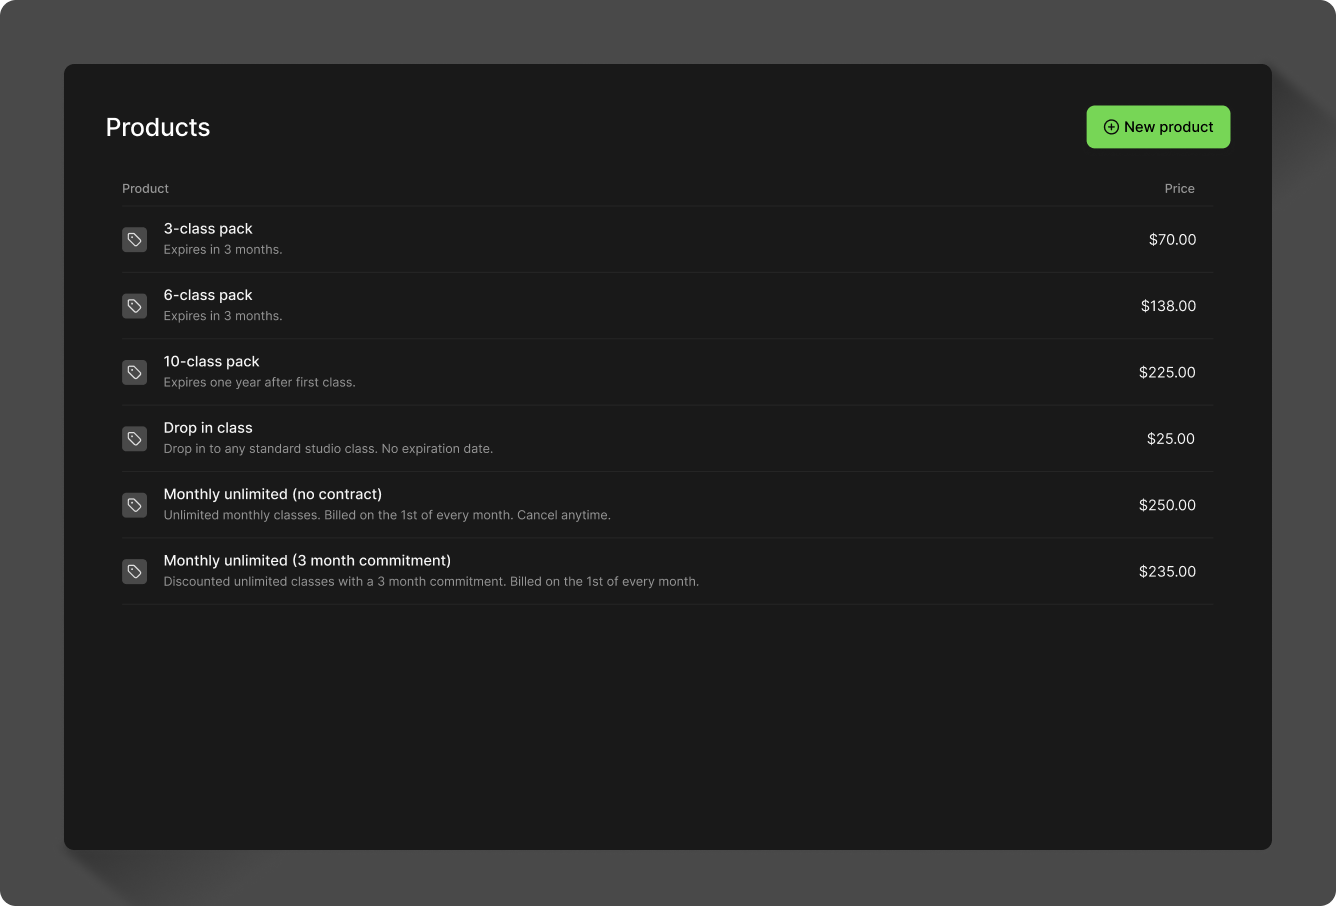
Create a product
Products are optional, but allow you to create a catalog of items with the following:
- Name
- Description
- Base price
- Image
- Options group
Options allow you create additional properties on each item, such as a minimum or maximum selection, or identifiers like small or blue.
See the product catalog guide for more information.
Move money with payment links
After successfully creating a new account with a funding source, you're ready to move money. The Dashboard will list all available payment methods for an account when you create a payment link.
You'll be able to add a sales tax, a surcharge fee (for credit card transactions), and enable tipping options.
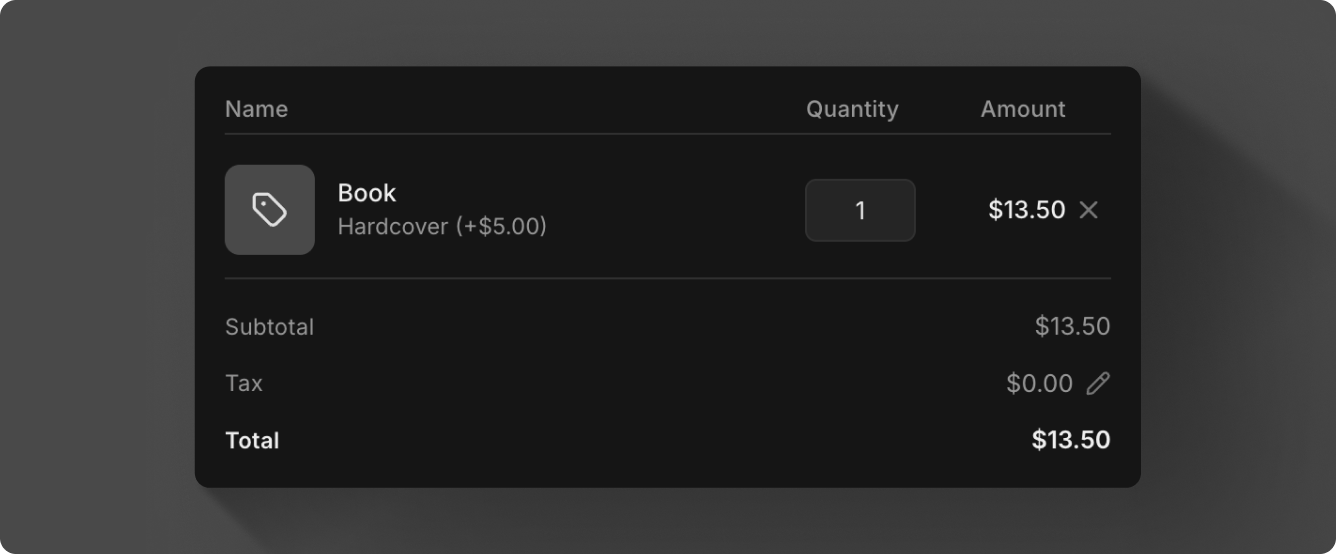
Tax
Select a product from the catalog or enter a free-form amount. You'll see Subtotal, Tax, and Total appear. You can click the edit icon next to Tax to manually add a tax to the item.
Surcharge fee
Surcharge fees can only be added to credit card transactions. Accounts must go through a registration process before surcharging is enabled. See the surcharges guide for more information.
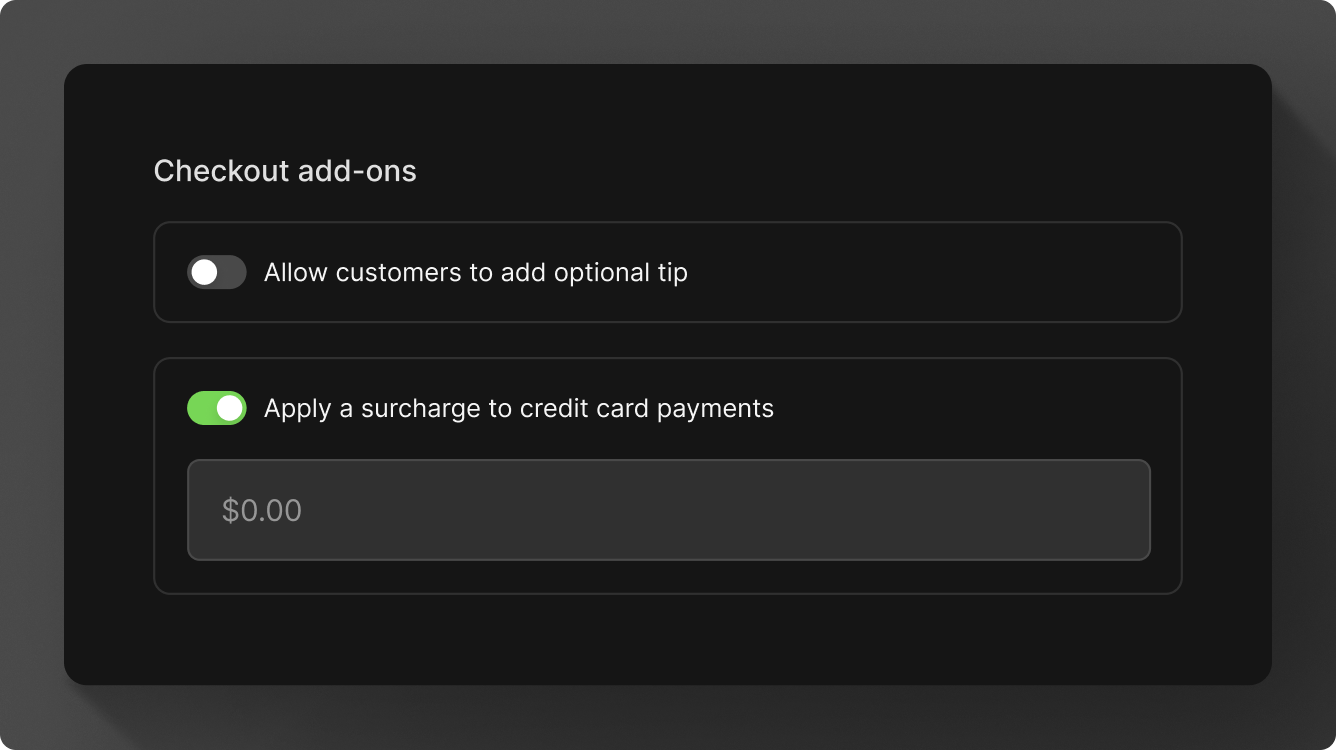
Tip options
Tips are enabled per payment link and can include preset options or a free-form option. Preset options can be either a percentage of the total, or set dollar amounts.
To set tipping presets, select the account from the account's list in the Dashboard and navigate to Settings. If you want to set presets for your own account, navigate to Settings > Business details.
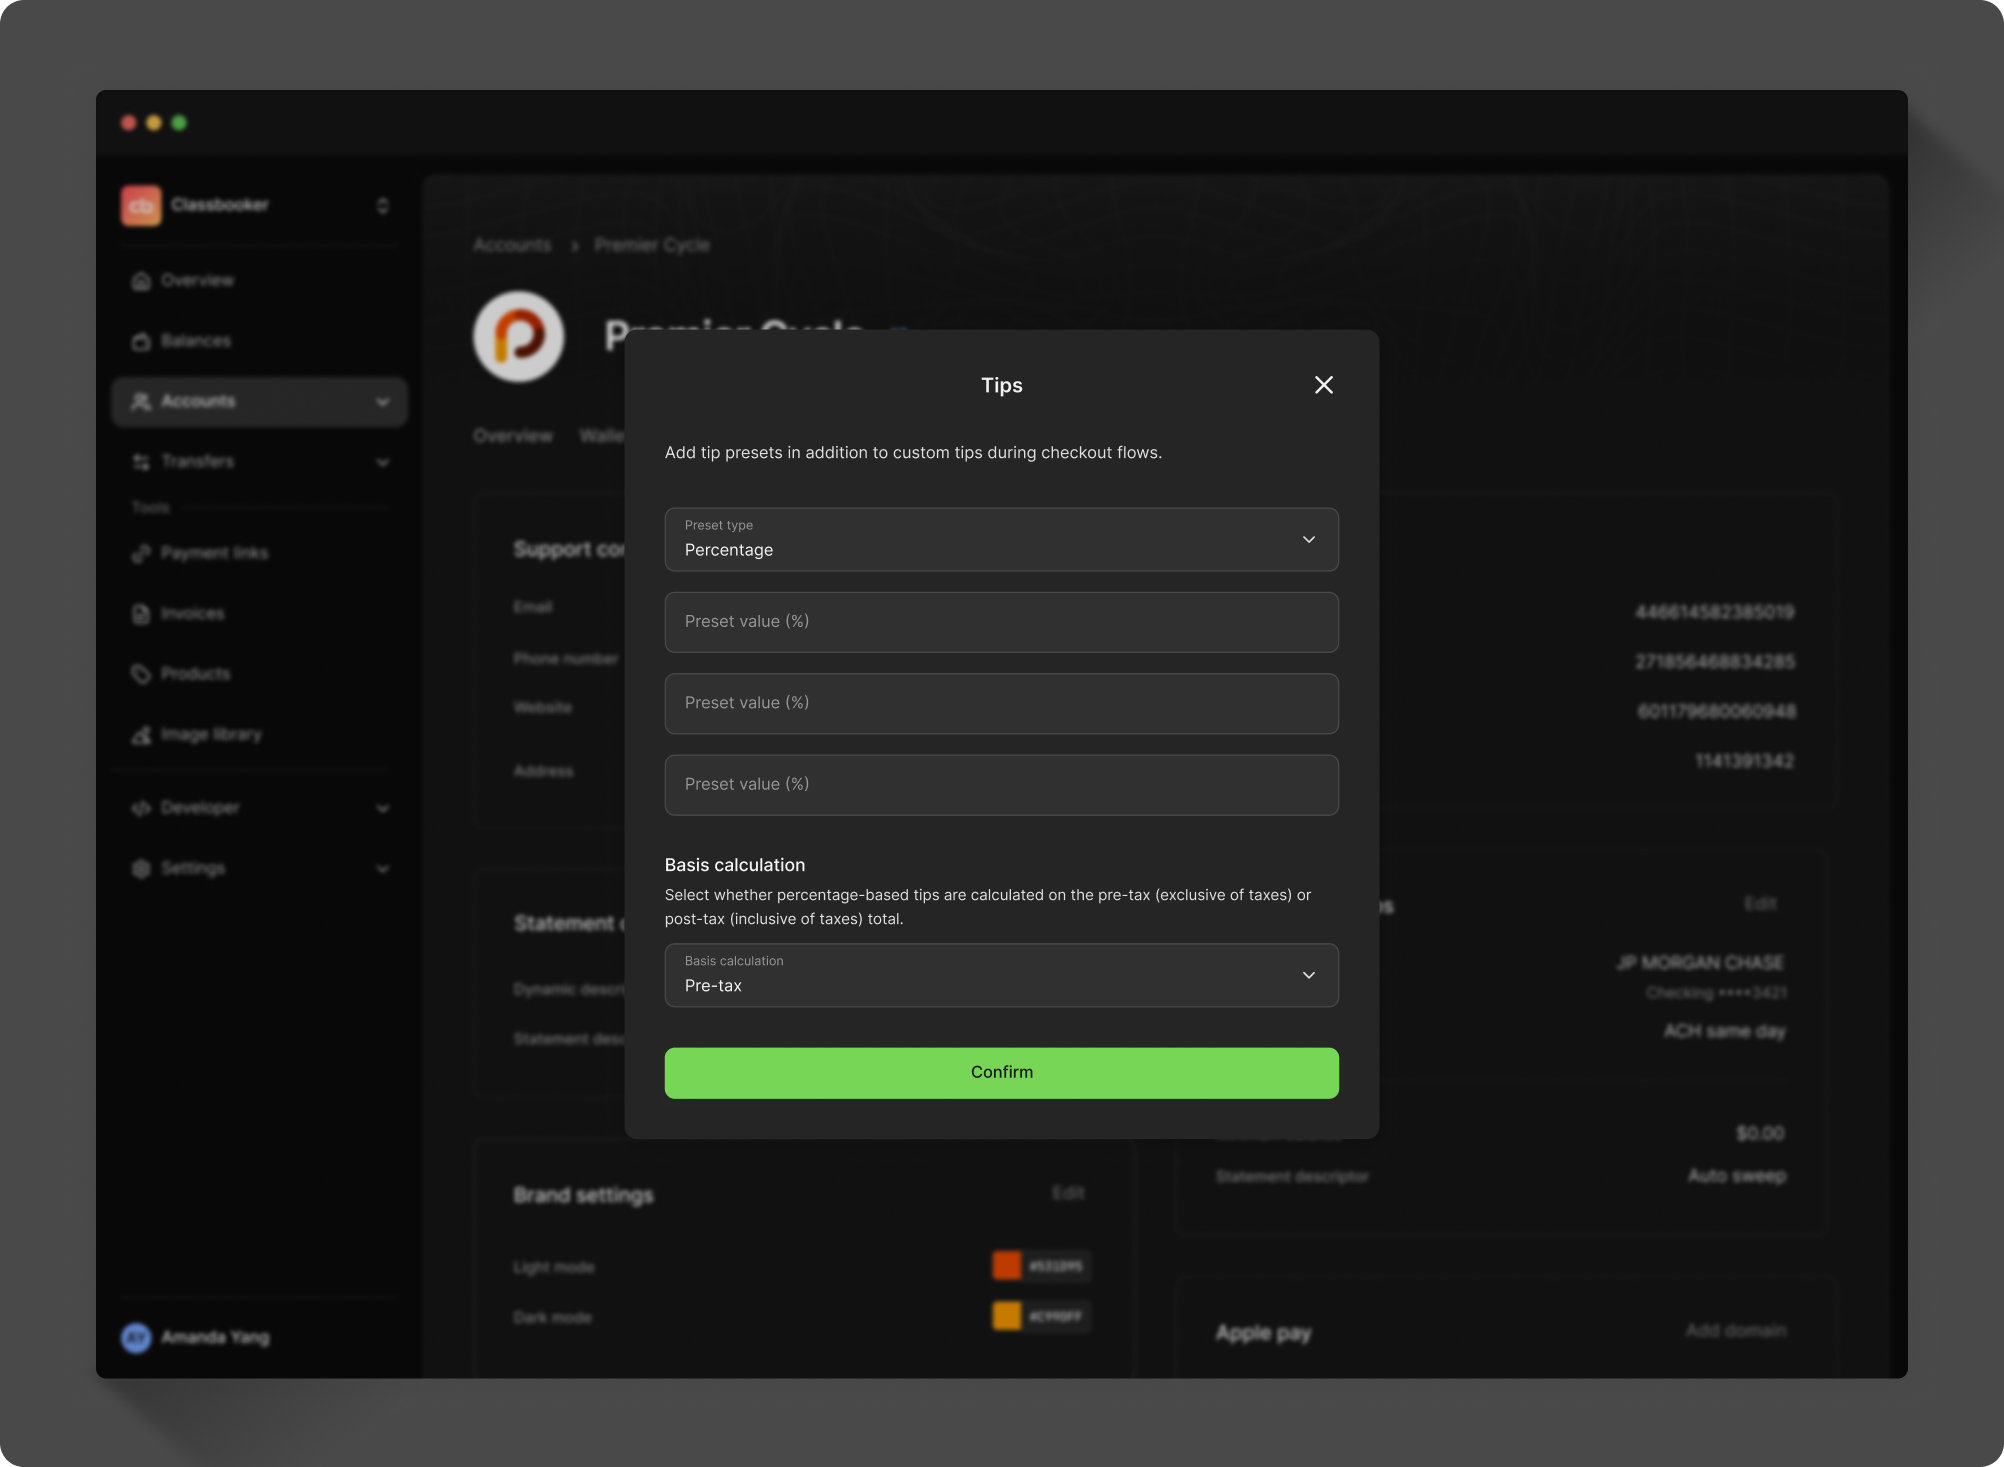
If you created presets, the tipping option is with the surcharge fee option under Checkout add-ons. If you've created presets they'll be displayed in the payment link. A free-form tip option will also be included with the presets. If you have not created presets, the payment link will only display a free-form tip option by default.
Send link
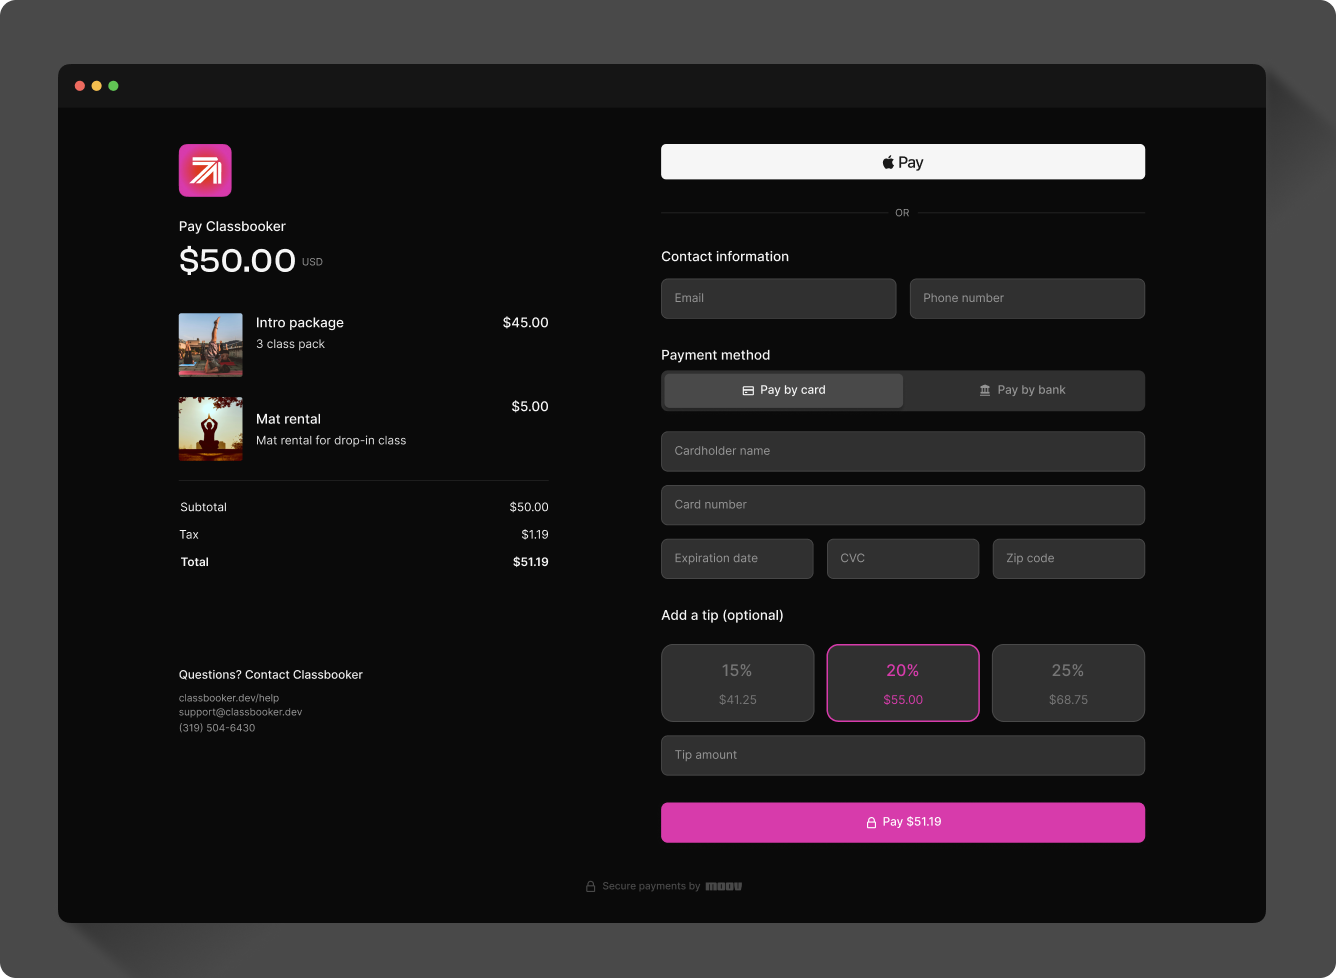
When you're ready, create and send a payment link via your chosen form of communication, such as email or SMS.
The payee will receive a branded payment link with the various payment and tip options that have been set.
View the Dashboard payment links guide for more information.
Resolution links
If an account doesn't finish onboarding, or the process results in errors, the Dashboard will alert you by showing a banner on the account page.

You can create a resolution link right from the banner. Resolution links are temporary, secure links you can send to businesses to resolve requirement errors surfaced during verification. Resolution links let end users self-serve by correcting or providing the additional information needed to resolve these errors and enable the capability.

Troubleshoot
Troubleshoot some common issues when integrating with and using Moov:
Transfers or payment links not working
Transfers and payment links will not work before capabilities are enabled. Ensure all involved accounts have the proper capabilities requested and enabled before attempting a transfer.
Missing terms of service agreement
All Moov accounts requiring wallet, send funds, or collect funds capabilities must agree to Moov's platform terms of service agreement. If the agreement is missing on an account, the account will not be able to participate in any action on Moov's platform that requires a wallet, sending funds, or collecting funds.
Next steps
You can manage wallet balances, send invoices, process refunds, and set up scheduled and recurring transfers all within the Dashboard. See our Dashboard documentation for more information.
Explore other ways to integrate Moov:
- API
- SDKs: Server-side & client-side
- Moov.js
- Drops